







2-Day Everest Base Camp High-Altitude Trek by Helicopter


Trip Overview


Overview
This one needs a different introduction than most tour pages, because it’s a different kind of trip. Most of what gets sold as an “Everest Base Camp helicopter tour” is a same-day sightseeing flight – you fly in, maybe land near Kala Patthar or Gorak Shep for ten or fifteen minutes, take some photos, fly home. This isn’t that. This is a helicopter-supported version of the actual trek, compressed into two days by flying in at altitude instead of walking up over two weeks, then walking the final stretch to Base Camp on your own legs before flying back out.
Let’s be straightforward about what that means. A normal Everest Base Camp trek takes about two weeks, and a big part of that time isn’t really about covering distance – it’s about acclimatization. Your body needs days at Namche, days at Dingboche, gradual altitude gain, so that by the time you’re standing at 5,364m your blood has had a chance to adjust. This itinerary skips almost all of that. You fly from Kathmandu, more or less sea-level by comparison, straight to Gorak Shep at 5,164m, in under an hour. Your body hasn’t had any of the two weeks it would normally get. That’s the entire trade-off of this trip: you save close to twelve days, and in exchange you’re taking on real altitude risk that a normal trek is specifically designed to avoid.
So this isn’t marketed as a shortcut for everyone, and it shouldn’t be. It’s built for people who already have some high-altitude experience, who are in genuinely good physical shape, who understand what rapid altitude gain does to a body, and who are traveling with proper evacuation insurance. If that’s not you, the standard 12-14 day trek is the right call, and there’s no shame in that – it’s the safer, more sensible way to see the same place.
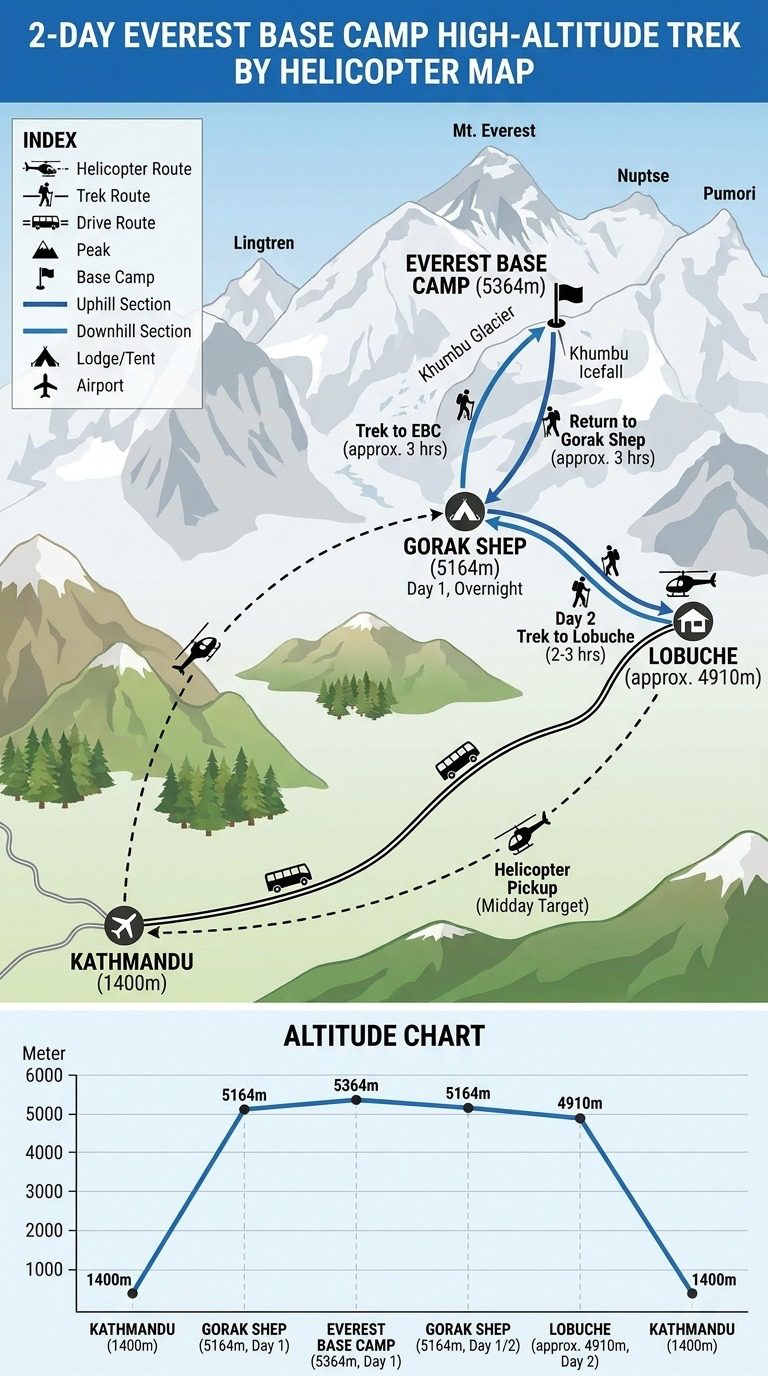
Here’s roughly how the two days run. You leave Kathmandu early, because the mountain weather window is always tightest in the morning. After check-in and a safety briefing, the helicopter takes you up into the Khumbu, and depending on conditions on the day, you land somewhere near Gorak Shep – the exact spot is the pilot’s call, not something anyone can promise in advance. Once you’re down, there’s no rush to start moving. You take stock, drink water, eat something light, meet your high-altitude guide, and let your body sit with the elevation for a bit before doing anything else.
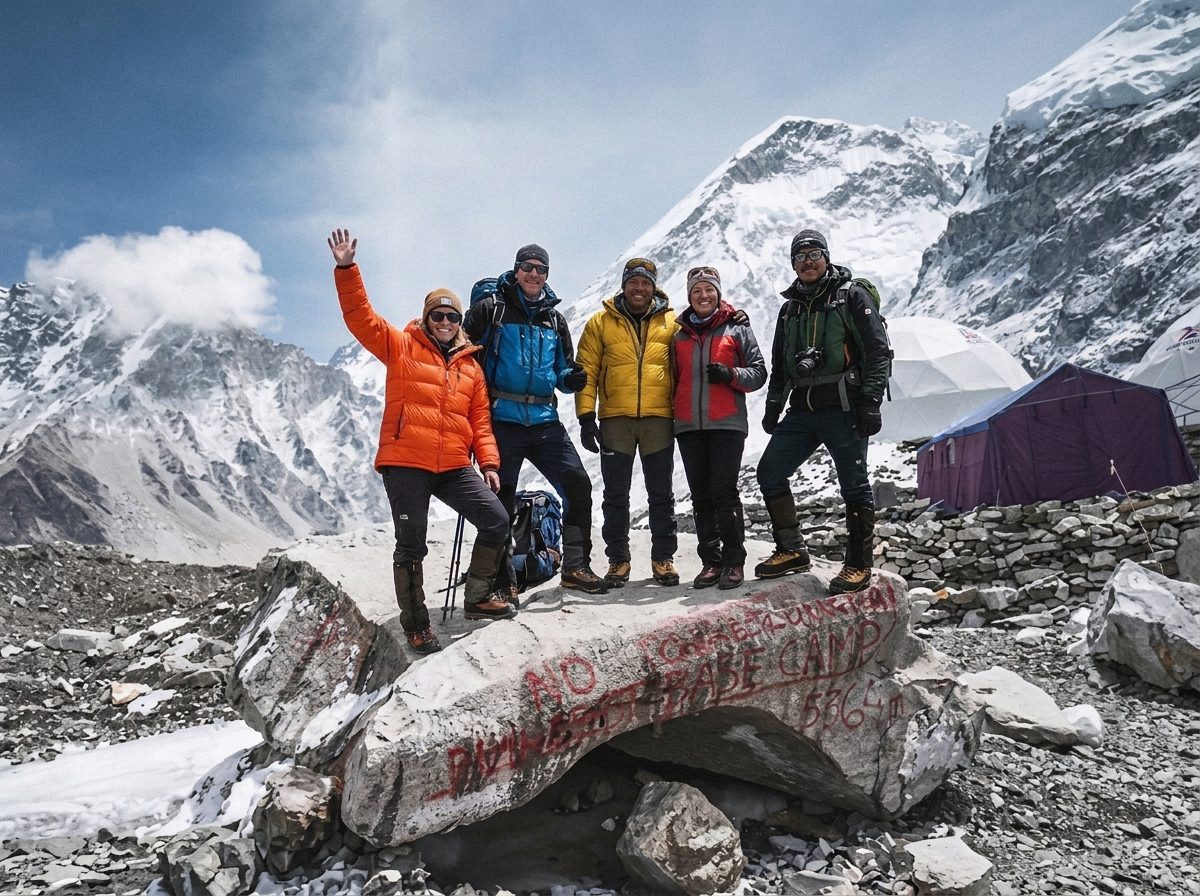
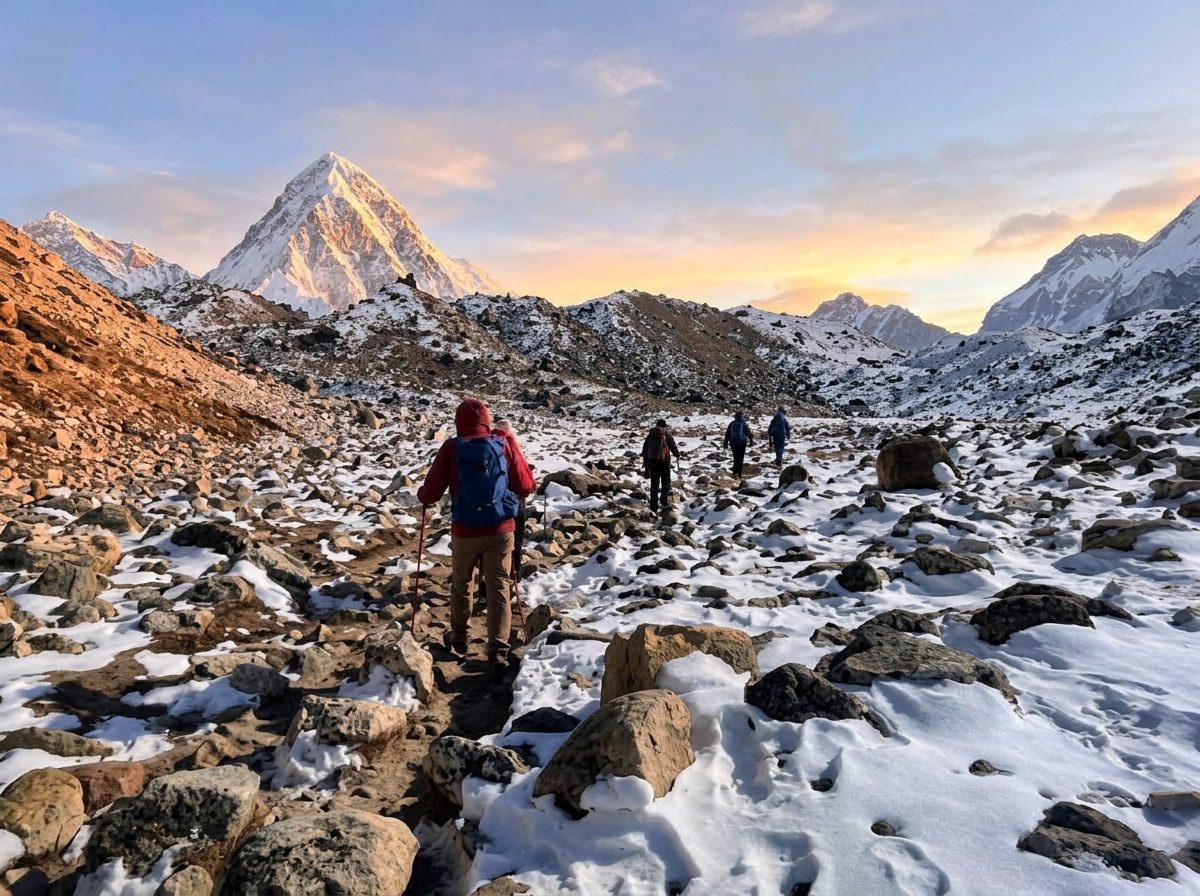
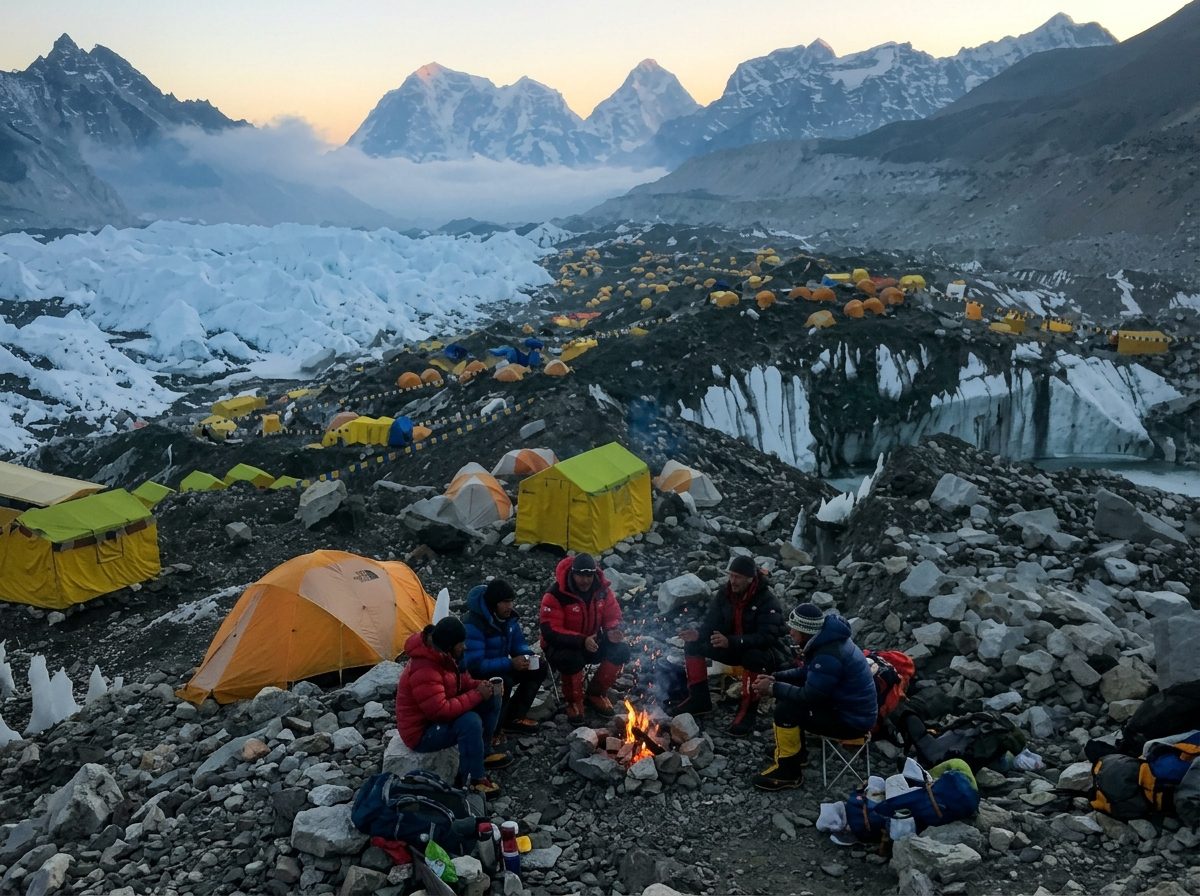
Then you trek to Base Camp. It’s about three hours one way from Gorak Shep, following rough, uneven ground alongside the Khumbu Glacier – loose rock, moraine, occasional ice, nothing technical but nothing easy either. Base Camp itself looks different depending on the season. During spring climbing season it can be a small tent city, full of expedition gear and mountaineers prepping for summit attempts. Outside that window it’s quieter, just rock, ice, and the presence of the mountain above you. You spend some time there – how much depends entirely on weather, wind, and how you’re feeling – then walk back to Gorak Shep for the night.
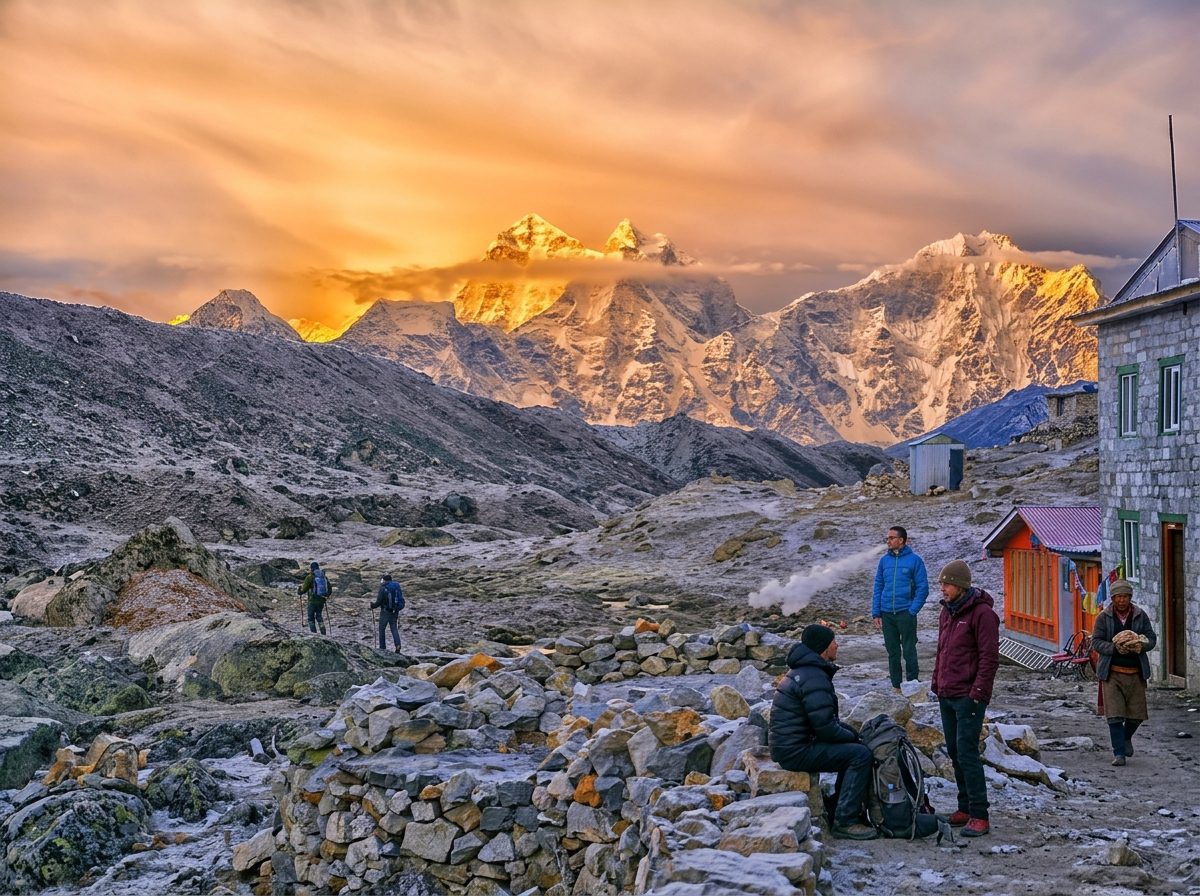
Overnight accommodation at that altitude is basic by design. Whether it’s a lodge room or a tent depends on the site and what’s permitted at the time, but either way it’s not meant to be luxurious – it’s meant to keep you warm, fed, and rested before an early departure. Dinner’s simple and easy to digest. No late nights. The whole evening is really just: eat, hydrate, sleep, and get ready to move again before dawn.
Day two starts early, around 4:30 or 5am. After a light breakfast you trek from Gorak Shep toward Lobuche, retracing part of the route from the day before. This section usually runs somewhere between two and three hours on its own, though if you’re combining it with any remaining time near Base Camp, plan on a longer morning – four to six hours is a more honest range to work with than pretending it’s always a clean two-hour walk. At Lobuche, you wait for helicopter pickup, and this is the part where flexibility really matters. A pickup window gets targeted, usually around midday, but it’s exactly that – a target, not a guarantee. Mountain helicopter operations run on weather, visibility, wind, and air traffic, in that order of importance, and none of those care what time your itinerary says you should be leaving.
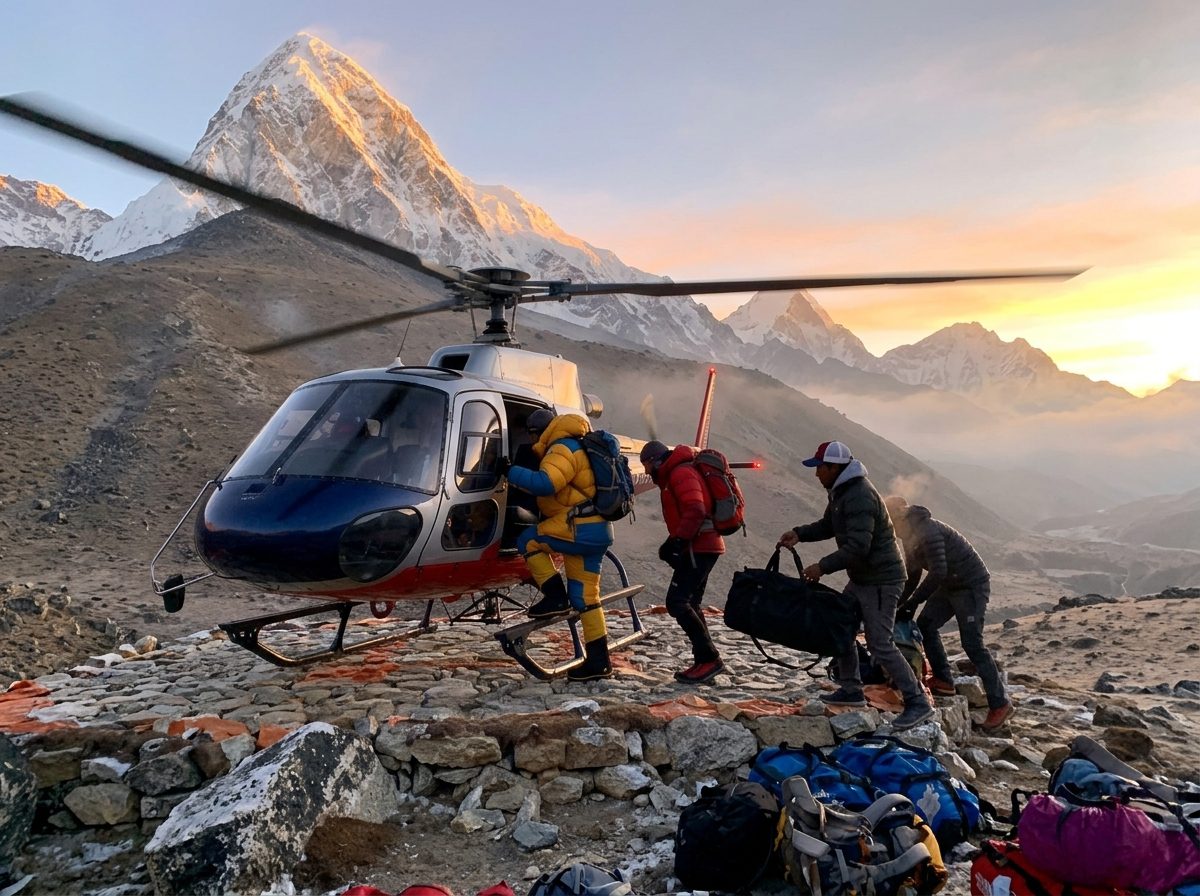
Once the helicopter does arrive, boarding is quick: your guide confirms who’s flying, the crew loads bags according to weight limits, and you’re back in the air heading toward Kathmandu or wherever your onward plans take you.
That’s the core two-day version. There’s also a longer option that adds the Gokyo Lakes area for people who want more of the Khumbu without turning this into a full multi-week trek – more on that further down.
A note on current helicopter access in the Khumbu
This matters enough to say plainly, up front, rather than burying it in fine print. Helicopter operations in the Everest region have gone through real regulatory changes in recent years, and the rules can shift again. As things stand:
- Helicopters generally do not land directly at Everest Base Camp itself. The camp sits on active glacier terrain with no fixed, maintained helipad, so operators fly close and low for views but land nearby instead, most commonly at Gorak Shep.
- Landings at Kala Patthar, which used to be a common stop on many helicopter itineraries, have been restricted following a serious accident in the region in 2023 and subsequent safety reviews. That restriction has been described by authorities as open-ended rather than permanent, but there’s no fixed date for when or whether it changes back.
- Some recent local government decisions have redirected certain helicopter stops toward Pheriche and the Everest View Hotel instead of higher landing points, partly to manage passenger groups and partly for environmental reasons.
- Group sizes on some current operations have been reduced from what used to be standard shared flights – a couple of operators are currently running this kind of high-altitude landing tour with as few as two passengers per rotation rather than a full cabin.
- Both the Sagarmatha National Park permit and the Khumbu Pasang Lhamu Rural Municipality permit apply to absolutely everyone entering the protected area, helicopter passengers included – there’s no shortcut around either one just because you flew in instead of walking.
None of this should be treated as fixed and permanent, because it hasn’t been. The honest way to sell this trip is to say landing locations, group sizes, and specific stops are confirmed close to your travel date based on the current rules in effect, not locked in months ahead. Anyone promising you an exact landing spot at Kala Patthar or a guaranteed touchdown at Base Camp itself, months before your flight, isn’t giving you accurate information.
Itinerary
Your Journey, Step by Step
Gorak Shep to Lobuche to Helicopter Pickup
Early start
You’re up around 4:30 to 5am. A light breakfast and something hot to drink, then a final gear check before setting off. Your guide runs through the same checklist as the day before – weather, wind, visibility, helicopter status, landing conditions, how everyone in the group is doing, and a check-in with the helicopter operator to confirm the plan is still on.
Trekking to Lobuche
The route to Lobuche follows the same general trail as the day before, just heading the other direction. How long this takes really depends on your exact path and pace – a straight Gorak Shep to Lobuche walk generally runs two to three hours, but if there’s any lingering time near Base Camp or a slower pace due to how people are feeling, four to six hours is a more realistic window to plan around. Better to under-promise on timing here than tell people it’s a guaranteed two-hour stroll, because at this altitude it rarely is.
Helicopter pickup at Lobuche
The target pickup window is generally somewhere around midday, but this is described as a target, not a fixed departure time, because it genuinely isn’t fixed. Mountain helicopter operations depend on weather, visibility, wind, air traffic in the area, aircraft availability, ground conditions at the pickup point, and the aircraft’s weight and performance limits at that altitude. All of that gets weighed by the pilot, and the decision is theirs alone.
One more thing worth knowing: the helicopter might not land exactly where your group is expecting. Pilots choose landing points based on what’s safe that day, which occasionally means a short walk to wherever they’ve decided to set down rather than the spot marked on a map weeks earlier.
Once the helicopter’s actually there, the process moves fast – your guide confirms everyone’s identity with the crew, bags get loaded according to weight allowances, you board when the crew tells you to, and you’re off.
Customize this trip with help from our local travel specialist that matches your Interests.
Customize This TripInclusions
- Kathmandu airport check-in assistance and safety briefing
- Helicopter transport to the Everest region and return
- One night of high-altitude accommodation at Gorak Shep (tented or basic lodge, depending on current site arrangements)
- Guided trekking with an experienced high-altitude guide for both days
- Meals during the trek portion of the trip (breakfast, simple dinner, hot drinks)
- Basic emergency communication equipment and monitoring by your guide
- National park and municipality permit arrangement
- Nepal visa
- International flights to and from Nepal
- Personal high-altitude gear (unless separately arranged for rental)
- Travel and medical insurance, including high-altitude helicopter evacuation coverage - this is not optional for this itinerary, even if it’s not bundled into the price
- Tips for guides, porters, and helicopter crew
- Any extension days needed due to weather delays
- Alcoholic drinks and personal purchases along the way
Maps
Navigate Your Journey
Good to Know
Your Journey, Step by Step
Accommodation, Meals, and Drinking Water: 2-Day Everest Base Camp Trek by Helicopter
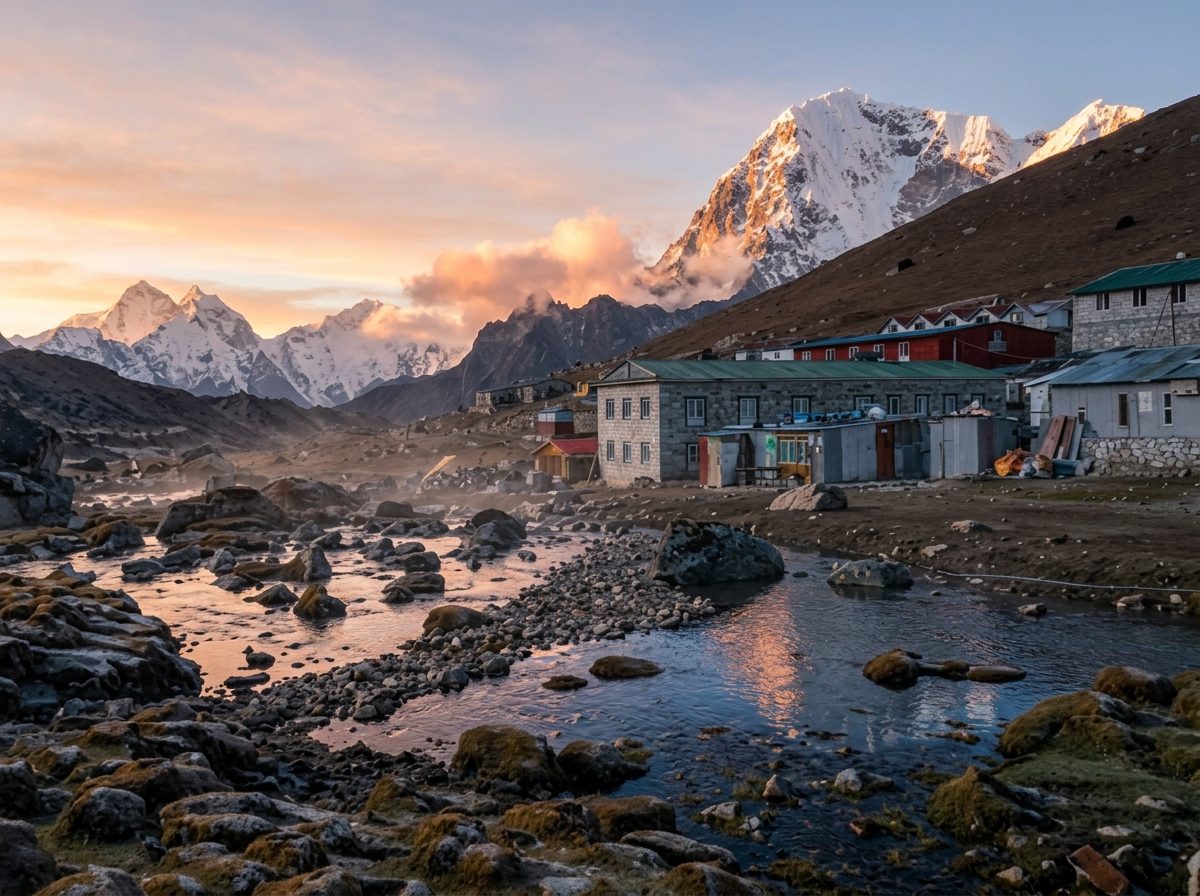
Overnight accommodation on the 2-day Everest Base Camp trek by helicopter is at Gorak Shep (5,164m) in a rudimentary high-altitude teahouse or seasonal tented camp. Rooms are unheated, separated by thin plywood partitions, with indoor temperatures regularly dropping between -10°C and -20°C, making an expedition-grade sleeping bag rated to -15°C or -20°C non-negotiable. Meals are kept light and carbohydrate-dense—such as garlic soup, Dal Bhat, and porridge—because sudden high-altitude exposure suppresses appetite and slows digestion. Trekkers must drink 4 to 5 liters of purified or boiled water daily to prevent dehydration from accelerating Acute Mountain Sickness (AMS).
This is an extreme mountain environment. You are dropping directly from Kathmandu’s mild climate into an outpost built on glacial moraine. Facilities are strictly functional and designed for survival and shelter, not comfort.
Part 1: The Lodging Reality at 5,164m (Gorak Shep)
Gorak Shep is not a village; it is a temporary cluster of stone-and-plywood lodges sitting on the edge of the Khumbu Glacier. There are no boutique hotels, luxury lodges, or heated bedrooms at this elevation.
The Bedrooms
- Bare-Bones Construction: Rooms are tiny cubicles with two single wooden beds, thin foam mattresses, and pillows. Interior walls are thin plywood. You will hear every cough, heavy breath, and zipper from neighboring rooms throughout the night. Pack foam earplugs.
- Sub-Zero Indoor Temperatures: Teahouse bedrooms never have wall heaters or electric blankets. When outside temperatures drop to -15°C or -20°C, the temperature inside your bedroom will drop below freezing within an hour of sunset.
- Sleeping Bag Requirement: Lodges provide heavy blankets, but they are cold, bulky, and not laundered daily. You must bring a high-fill down sleeping bag rated down to at least -15°C to -20°C. Sleep with your thermal base layers, wool socks, and beanie on inside your bag.
Bathrooms and Sanitation
- Communal Squat Toilets: Bathrooms are shared stalls located at the end of the corridor or in an outhouse. Most feature porcelain squat toilets.
- No Running Water: Because ambient temperatures stay below freezing for most of the year, water pipes freeze and crack. Toilets are flushed manually by scooping water from a plastic drum with a pitcher. By early morning, the water in these drums often has a layer of ice that you have to break through.
- Plumbing Rules: Never drop toilet paper, wet wipes, or sanitary products down the toilet. Mountain drainage lines freeze and clog instantly. Place all waste in the bin provided inside the stall. Bring your own toilet paper and hand sanitizer; lodges do not supply them.
- No Showers: Hot showers do not exist at Gorak Shep, and even if water could be heated, stripping down in sub-zero air at 5,164 meters is extremely dangerous. It triggers violent shivering, rapid body heat loss, and can accelerate chest infections or altitude sickness. Use personal wet wipes to clean up before bed.
The Dining Hall (Your Only Warm Space)
The communal dining room is the only heated area in the lodge. A central chimney stove burns dried yak dung for two to three hours every evening from 5:00 PM to 8:00 PM. Trekkers, guides, and porters huddle around this stove to warm up, rehydrate, and eat dinner before retreating to their freezing bedrooms.
Part 2: High-Altitude Food & Appetite Realities
Arriving directly at 5,164 meters in under an hour shocks your digestive system. Thin air reduces oxygen delivery to the stomach, which suppresses hunger hormones and slows down digestion.
What Happens to Your Appetite?
Most travelers land at Gorak Shep and feel zero desire to eat. Forcing yourself to consume calories is difficult, but your body burns through energy at twice its normal rate just trying to stay warm and oxygenate your blood.
Recommended Trail Meals
Keep meals light, warm, and rich in carbohydrates. Avoid heavy proteins, grease, or rich fats, which take longer to digest and often trigger acute nausea or vomiting at altitude.
- Garlic Soup: The classic Himalayan remedy. Local Sherpas swear by fresh garlic broth to stimulate blood flow, warm the core, and relieve mild altitude headaches.
- Dal Bhat: Steamed white rice, mild lentil soup, and seasonal vegetable curry. It is easy on the stomach, provides steady fuel, and comes with free refills.
- Carbohydrate Staples: Steamed vegetable momos, plain boiled potatoes with salt, vegetable noodle soup (Thukpa), and macaroni with mild tomato sauce.
- Breakfast: Hot oatmeal porridge with honey, plain toast, and boiled eggs.
The Strict Vegetarian Rule
Do not eat meat at Gorak Shep or Base Camp. Animals are not slaughtered in the sacred Sagarmatha National Park. Any chicken, buffalo, or pork served this high has been carried up from lower villages on foot or yak back for several days without refrigeration. Eating meat at 5,164 meters carries a severe risk of food poisoning, which can force an immediate emergency medical evacuation.
Meal Inclusions
Your trek package includes a hot dinner at Gorak Shep on Day 1 and a light breakfast before departure on Day 2. Hot black tea, lemon tea, and ginger tea are provided with meals.
Part 3: Hydration & Drinking Water Protocol
Dehydration is the single biggest multiplier of Acute Mountain Sickness. At 5,000 meters, you breathe at nearly double your normal rate, exhaling massive amounts of moisture with every breath in the dry, freezing air.
The 4-to-5 Liter Rule
You must drink a minimum of 4 to 5 liters of fluid per day on this itinerary. If your urine is dark yellow, you are dangerously dehydrated. Aim for clear or pale-straw-colored urine throughout the trip.
Preventing Your Water from Freezing
- Do Not Leave Bottles on the Floor: Ambient air at floor level in your bedroom will freeze water solid overnight. Keep your water bottles inside your duffel bag wrapped in clothing, or tuck them directly inside your sleeping bag.
- The Nalgene Bed Warmer Trick: Order 1 liter of boiling water from the teahouse kitchen right before bed. Pour it into a rigid, wide-mouth Nalgene bottle, make sure the cap is screwed on tight, and slide it into the bottom of your sleeping bag. It acts as a personal radiator that keeps your feet warm for 4 to 5 hours, and by morning, you have clean, room-temperature drinking water ready to go.
Water Treatment
- Never Drink Tap Water: Water from local lodge taps comes from high glacial runoff and can contain sediment or bacterial contaminants.
- Purification Tablets Take Longer: Chemical purification tablets (chlorine dioxide or iodine) take significantly longer to dissolve and sterilize water in near-freezing temperatures. If a tablet normally takes 30 minutes at sea level, wait at least 60 to 90 minutes before drinking.
- Boiled Water: Purchasing kettles of boiled water directly from the kitchen is the safest and most reliable hydration method at Gorak Shep.
Gorak Shep (5,164m) Lodging & Dining Summary Table
| Category | Facility Reality | Cost & Inclusions | Critical Advice |
| Room Setup | Twin wooden beds, thin plywood walls, zero insulation | Included in package | Bring earplugs; no private bathrooms |
| Room Heating | Zero heating in bedrooms (-10°C to -20°C) | None available | -15°C to -20°C down sleeping bag mandatory |
| Bathrooms | Shared communal squat stalls; no running water | Included in lodge | Manual bucket flush; bring own toilet paper |
| Showers | No showers available | Do not attempt | Use personal wet wipes; avoid hypothermia |
| Dining Room | Heated by yak dung stove 5:00 PM – 8:00 PM | Communal access | Wear down jacket even while eating dinner |
| Dinner (Day 1) | Garlic soup, Dal Bhat, noodles, potatoes | Included in package | Eat light; strictly avoid meat and alcohol |
| Breakfast (Day 2) | Porridge, toast, eggs, hot tea | Included in package | Eat early (4:30 AM) before trekking to Lobuche |
| Drinking Water | Boiled water or purified glacial tap | Extra cost (~3–4/liter) | Drink 4–5 liters daily; sleep with your bottle |
Electricity, Internet, and Mobile Data: 2-Day Everest Base Camp Trek by Helicopter
Charging personal devices at Gorak Shep (5,164m) costs between NPR 600 and NPR 1,000 ($5 to $8 USD) per item using communal solar-powered strips, with zero electrical outlets in private bedrooms. Internet access relies on prepaid Everest Link Wi-Fi cards ($15 USD for 10GB) or spotty NTC 4G mobile data, which fluctuates heavily with cloud cover and solar battery levels. Because sub-zero night temperatures (-15°C to -25°C) drain lithium-ion batteries within minutes, carrying a fully charged 10,000 to 20,000 mAh power bank and sleeping with electronics inside your sleeping bag is essential.
You are staying at the highest commercial lodge settlement in the world. Infrastructure is completely off-grid, and power is a strictly managed commodity.
Part 1: Electricity & Device Charging Realities at 5,164m
Gorak Shep relies 100% on photovoltaic solar panels connected to deep-cycle battery banks in the dining hall. When heavy cloud cover or snowfall hits the valley, power generation drops to near zero.
No In-Room Outlets
There are no electrical sockets inside teahouse bedrooms. To charge any device, you must bring your charging cable and device to the dining hall counter and pay the lodge manager in cash.
Charging Fees (Per Device)
Because fuel for backup generators must be flown into Lukla and carried up on yaks, electricity fees at Gorak Shep are the highest in Nepal:
- Smartphones: NPR 600 to NPR 800 ($5 to $6.50 USD) per full charge.
- Camera batteries: NPR 500 to NPR 700 ($4 to $5.50 USD).
- High-capacity power banks (10,000 to 20,000 mAh): NPR 800 to NPR 1,000 ($6.50 to $8 USD).
The Smart Traveler Strategy: Skip the Lodge Charging
Because this is a short 2-day itinerary, you should not waste money paying lodge charging fees. Fully charge a 20,000 mAh power bank in Kathmandu before you fly out. A single 20,000 mAh unit provides four to five full smartphone charges—more than enough to power your phone and camera for the entire 48-hour trip. Make sure your power bank is packed in your carry-on luggage for the flight, as airlines ban loose lithium batteries in checked bags.
Part 2: The Cold Battery Protocol (Keeping Gear Alive at -20°C)
Sub-zero temperatures drastically slow down the chemical reactions inside lithium-ion batteries. A smartphone displaying 85% battery will drop to 1% or shut down instantly after taking two photos in the freezing wind along the Khumbu Glacier.
- Sleep With Your Electronics Never leave your phone, camera, or power bank sitting on the wooden floor or nightstand in your unheated Gorak Shep bedroom. Place all electronic devices inside a small dry bag and tuck them into the bottom of your sleeping bag. Your body heat keeps the battery cells warm and prevents complete overnight discharge.
- Keep Phones in Your Chest Pocket While trekking from Gorak Shep to Everest Base Camp and down to Lobuche, never carry your phone in an outside jacket pocket or in the exterior pouch of your daypack. Store it in a zippered inside chest pocket beneath your down jacket, close to your core body heat. Pull it out only when ready to take a photo, and return it inside your layers immediately.
- Turn on Airplane Mode In remote mountain terrain, smartphones burn through battery life rapidly by constantly searching for faint cellular towers. Keep your phone on Airplane Mode throughout the trek to conserve battery for photos and navigation.
Part 3: Internet & Mobile Cellular Connectivity
You can send messages and photos from 5,000 meters, but you should not expect to stream video or participate in video conference calls.
1. Everest Link Wi-Fi (The Primary High-Altitude Network)
Everest Link is the high-altitude wireless network operating throughout the Khumbu region via mountain-top microwave links.
- Availability: Operational in Gorak Shep and Lobuche lodges.
- Cost: A 10GB prepaid scratch card costs NPR 2,000 (~$15 USD) and is valid for 30 days across any teahouse in the network.
- Performance: Works well for WhatsApp text messages, voice notes, and sending photos. However, connection speeds slow down noticeably between 6:00 PM and 8:00 PM when all guests in the dining hall connect at the same time. During heavy snowstorms or when solar batteries run low after dark, the Wi-Fi router often shuts down.
2. Mobile Cellular Data (NTC vs. Ncell)
- NTC (Nepal Telecom): NTC operates a cellular tower near the Italian Pyramid research station below Lobuche. When skies are clear, this tower provides a functional line-of-sight 3G or 4G data signal at Gorak Shep and along the moraine to Base Camp. Data speeds are fastest between 10:00 AM and 2:00 PM.
- Ncell: Ncell has virtually zero reliable coverage at Gorak Shep or Everest Base Camp. Do not purchase an Ncell SIM card for this itinerary.
- Cost: An NTC 4G tourist data package offering 10GB to 20GB costs around NPR 500 to NPR 800 ($4 to $6 USD) in Kathmandu.
The Connectivity Dead Zone
The final stretch of the trail inside the Everest Base Camp glacial bowl sits in the shadow of the Nuptse-Lhotse ridge. Cellular reception drops out completely as you approach the Khumbu Icefall. Prepare to be offline while standing at Base Camp.
Part 4: Emergency Communication Systems
Because this itinerary lands you directly at 5,164 meters with no acclimatization buildup, emergency communication is treated as a critical safety operational protocol, not an afterthought.
Your high-altitude guide carries:
- A certified satellite communicator (Garmin inReach or Iridium satellite phone) capable of two-way satellite messaging independent of local cellular towers or Wi-Fi networks.
- A high-frequency two-way VHF radio linking directly to local lodge managers and helicopter ground handlers in Pheriche and Lukla.
- Pre-programmed emergency channels directly connecting to helicopter flight operations in Kathmandu for immediate evacuation coordination if Acute Mountain Sickness (AMS) symptoms occur.
Electricity & Connectivity Summary Table
| Location | Power Source | Device Charging Cost | Mobile Network (NTC) | Wi-Fi Options & Speed |
| Gorak Shep (5,164m) | Rooftop solar & battery bank | NPR 600–800 (Phone)
NPR 800–1,000 (Power bank) |
Spotty 3G / 4G (Line of sight; best midday) | Everest Link ($15 for 10GB); fair text messaging |
| Everest Base Camp (5,364m) | None (Glacier terrain) | No charging available | No service / Dead zone | No public Wi-Fi (Expedition teams use private Starlink) |
| Lobuche Pickup (4,940m) | Solar power & generator | NPR 500–600 (Phone) | Stable 4G / 3G (Near Pyramid tower) | Everest Link available in lodges |
Trek Difficulty and Physical Preparation: 2-Day Everest Base Camp Trek by Helicopter
The 2-day Everest Base Camp trek by helicopter is rated extreme in difficulty due to sudden, high-altitude exposure, despite covering only 16 to 18 kilometers of total walking. You drop straight out of the sky from Kathmandu into Gorak Shep at 5,164 meters with zero acclimatization days. Walking across rough glacial moraine in air containing 50% less oxygen than sea level turns a moderate distance into a grueling physical challenge.
This is not a beginner tour, and it should never be sold as a casual shortcut. It is an intense, physically demanding high-altitude mission built strictly for fit travelers with prior high-elevation experience.
Part 1: Why This Trip Is Classified as “Extreme”
On paper, walking five to six hours to Everest Base Camp and three hours down to Lobuche looks manageable. At sea level, it would be an easy day hike. At 5,300 meters, it is entirely different.
The Altitude Shock
On a classic 14-day Everest Base Camp trek, you take over a week to walk up through Namche Bazaar and Dingboche, giving your bone marrow days to generate extra red blood cells. On this 2-day itinerary, you bypass all of that buildup in a 45-minute flight. The second your boots hit the ground at Gorak Shep, your resting heart rate spikes by 25 to 35 beats per minute. Every small incline feels like running a sprint, and your lungs will work at maximum capacity even while walking on flat terrain.
The Glacial Moraine Trail
The trail between Gorak Shep and Everest Base Camp is not a smooth dirt path. It is a shifting, uneven route cut directly through the lateral moraine of the Khumbu Glacier.
- You walk on loose rock, unstable scree, and boulders that shift beneath your feet.
- Short sections cross exposed black ice and frozen glacial mud where slipping is an immediate hazard.
- Your stabilizing ankle and knee muscles work continuously to maintain balance, draining your physical energy twice as fast as walking on a groomed trail.
The Return Trek to Lobuche (Day 2)
After a night of restless, unacclimatized sleep at 5,164 meters, Day 2 starts before dawn. You hike two to three hours down the moraine valley to Lobuche for your helicopter pickup. If your body is struggling with the thin air, this walk can easily stretch into four to five hours of slow, heavy-legged trudging.
Part 2: Who Should (and Should Not) Book This Trip
Being completely honest about who this trip is designed for protects both your safety and your travel investment.
Well Suited To:
- Experienced mountain trekkers who have already tested their bodies above 4,000 meters (such as Kilimanjaro, the Annapurna Circuit, the Inca Trail, or high Colorado/Alps peaks) and know how their lungs react to thin air.
- Athletes with exceptional cardiovascular conditioning (marathoners, triathletes, endurance cyclists, cross-fit athletes).
- Travelers with limited vacation time who understand the real risks of rapid altitude exposure and are traveling with comprehensive high-altitude helicopter evacuation insurance.
- Hikers who are comfortable dealing with severe sub-zero cold and basic mountain living.
Strictly Not Recommended For:
- First-time mountain travelers with zero prior trekking experience.
- Anyone who has never spent time above 3,500 meters.
- Travelers with below-average physical fitness or joint/knee problems.
- Anyone with a medical history of cardiovascular disease, severe asthma, chronic respiratory conditions, or high blood pressure.
- Travelers seeking a relaxing, comfortable holiday with hot showers and luxury amenities.
Part 3: Physical Training Plan (Start 8 to 12 Weeks Out)
You cannot train your lungs for thin air at sea level, but you can build a massive cardiovascular engine that uses available oxygen with maximum efficiency.
1. High-Intensity Aerobic Cardio (4 Days a Week)
Maximize your VO2 max so your body handles high heart rates under physical stress.
- Run, cycle, row, or swim for 45 to 60 minutes four times a week.
- Include weekly interval sessions: warm up for 10 minutes, then do 30-second maximum-effort sprints followed by 90 seconds of recovery, repeated 8 to 10 times. This trains your heart to clear lactic acid rapidly.
2. Stair Climbing With a Loaded Pack (Your Core Workout)
Glacial moraine requires intense leg drive and ankle stability.
- Find a stadium, tall building stairwell, or gym stair-climber machine.
- Climb stairs continuously for 45 to 60 minutes, three times a week.
- Wear a backpack loaded with 8 to 10 kg (17 to 22 lbs) to condition your lower back, hips, and calves for carrying weight on trail.
3. Eccentric Leg Strength for Downhill Balance
Descending rough scree on Day 2 puts heavy impact on your quadriceps and patellar tendons. Strengthen the stabilizing leg muscles:
- Weighted walking lunges: 3 sets of 15 reps per leg.
- Goblet squats: 3 sets of 15 reps.
- Step-downs on a 12-inch box: 3 sets of 12 reps per leg to mimic stepping down off steep moraine boulders.
- Single-leg calf raises and balance board drills to bulletproof your ankles against rolling on loose rocks.
Part 4: Gear That Directly Reduces Physical Strain
Carrying the wrong gear at 5,300 meters turns a difficult trek into an impossible one.
- Trekking Poles Are Mandatory: Do not attempt this trail without two sturdy, flick-lock telescopic trekking poles with rubber tips and carbide points. Poles take up to 20% of your body weight off your knees and give you two extra points of contact on shifting glacier rocks.
- Rigid, Broken-In Footwear: Wear waterproof trekking boots with high ankle support and stiff Vibram lug soles. Soft running shoes or flexible sneakers offer zero protection when your foot slides between jagged moraine boulders.
- Keep Your Daypack Under 4 kg (9 lbs): On Day 1 and Day 2, you carry only your essentials: 2 liters of water, down jacket, windproof shell, sunglasses, beanie, gloves, and small first-aid kit. Every extra pound on your back directly robs your lungs of oxygen on uphill moraine sections.
Preparation & Eligibility Checklist Table
| Requirement | Mandatory Standard | Why It Matters |
| Prior Altitude Exposure | Minimum 4,000m on past trips | You must know how your body handles low oxygen before landing at 5,164m |
| Cardio Training | 8 to 12 weeks of endurance work | Delays extreme exhaustion on the glacial moraine |
| Medical Clearance | Doctor consultation for high altitude | Rules out latent heart or lung risks before rapid ascent |
| Trekking Poles | Pair of sturdy flick-lock poles | Prevents falls on loose moraine and reduces knee impact by 20% |
| Footwear | Broken-in ankle-support boots | Protects against twisted ankles on shifting rocks |
| Travel Insurance | Heli evacuation up to 6,000m | Mandatory requirement; rescue flights cost $3,000+ without insurance |
Why this trip needs a clear safety framework
Going from Kathmandu to roughly 5,164m in under an hour is not something a standard trekking itinerary would ever do, and for good reason. A normal Everest Base Camp trek takes about two weeks specifically because the acclimatization stops at places like Namche and Dingboche matter – they’re not padding, they’re the mechanism that lets your body handle the altitude safely. This itinerary compresses all of that into essentially zero adjustment time before you’re already above 5,000m.
That’s not a reason to avoid this trip if you’re the right kind of traveler for it. It is a reason to be completely upfront about who it’s for and who it isn’t.
Well suited to
- Experienced high-altitude trekkers who’ve spent meaningful time above 4,000m before
- Travelers in strong physical condition
- People generally comfortable in demanding mountain environments
- Anyone who understands, and accepts, the real risk that comes with rapid altitude gain
- Travelers carrying appropriate insurance that covers high-altitude emergency evacuation
Not a good fit for
- First-time high-altitude travelers
- Anyone in below-average physical condition
- People who’ve never spent time above 4,000m
- Anyone currently showing symptoms of altitude illness, even mild ones
- Anyone whose doctor has specifically advised against high-altitude travel
If altitude sickness symptoms do show up and don’t clear on their own, the answer is never to keep going higher – it’s to descend. That’s not a suggestion, it’s the accepted, proven response, and it’s built into how this itinerary should be run, with a clear descent plan agreed before you ever leave Kathmandu.
How to Prepare (And Why This Isn’t for Beginners)
You cannot fake your way through this trip. Dropping straight out of the sky into 5,164m without days of walking to acclimatize is a massive shock to the system. This itinerary is built strictly for seasoned trekkers who have already tested their bodies above 4,000 meters on previous trips.
How do you prepare? First, you need serious cardiovascular stamina. Start running, cycling, or stair-climbing with a heavy pack months in advance. Second, know your own body. If you haven’t done a high-altitude trek before—like Kilimanjaro, the Annapurna Circuit, or the classic EBC route—do not book this. You need to know exactly how your lungs and head react to thin air before you get into that helicopter.
Acclimatization and Altitude Sickness (AMS): 2-Day Everest Base Camp Trek by Helicopter
Acute Mountain Sickness (AMS) is the primary medical risk on the 2-day Everest Base Camp trek by helicopter because you ascend from Kathmandu (1,400m) directly to Gorak Shep (5,164m) in under an hour, bypassing the standard 8 to 10 days of gradual acclimatization. At 5,164 meters, atmospheric pressure drops by nearly half, delivering roughly 50% less oxygen to your bloodstream per breath. Managing this rapid exposure requires prophylactic Diamox (Acetazolamide) consultation, drinking 4 to 5 liters of water daily, walking at a strictly measured pace, continuous guide pulse oximeter checks, and an immediate descent protocol if symptoms worsen.
This is an aggressive high-altitude itinerary. It breaks the standard mountaineering rule of limiting sleeping elevation gains to 500 meters per day above 3,000m. That is why it is operated exclusively with professional high-altitude guides, medical oxygen, and clear contingency plans to descend early if your body rejects the elevation.
Part 1: The Physiological Reality of Rapid Ascent
When you step out of the helicopter at Gorak Shep, your body undergoes immediate physiological shock:
- Blood Oxygen Drop: Your blood oxygen saturation (SpO2) will drop instantly from a normal sea-level baseline of 98% down to between 70% and 80%.
- Heart Rate Spike: Your resting pulse will accelerate by 25 to 35 beats per minute as your heart works to circulate oxygen-poor blood to your vital organs.
- Respiratory Workload: You will breathe deeper and at twice your normal rate, even while sitting completely still on your pack.
Your body normally needs days at Namche Bazaar (3,440m) and Dingboche (4,410m) to produce extra red blood cells to compensate for this thin air. Because this itinerary skips that process, you are operating entirely on raw cardiovascular fitness, hydration, and medical risk management.
Part 2: Recognizing the Symptoms (Mild AMS vs. Severe Emergencies)
Knowing the difference between normal high-altitude discomfort and a life-threatening medical emergency is critical.
Mild to Moderate AMS (Expected Discomfort)
Almost every traveler on this rapid itinerary experiences some mild symptoms within 2 to 6 hours of landing:
- A dull, persistent headache (often across the forehead or behind the temples) that does not fully clear after taking ibuprofen or paracetamol
- Mild nausea, loss of appetite, and feeling bloated
- Dizziness or lightheadedness when standing up quickly
- General fatigue and a heavy, lead-like feeling in your legs
- Restless, broken sleep accompanied by vivid dreams and periodic waking gasps for air
Severe Medical Emergencies (HAPE and HACE)
If mild symptoms are ignored and fluid begins collecting in the lungs or brain, condition can deteriorate rapidly into life-threatening emergencies:
- High Altitude Pulmonary Edema (HAPE – Fluid in Lungs):
- Inability to catch your breath while lying flat in bed
- Extreme breathlessness with zero physical exertion
- A persistent, dry hacking cough that progresses into a wet, rattling cough
- Coughing up pink, frothy sputum
- Bluish or gray discoloration of the lips and fingernails (cyanosis)
- Severe chest tightness and rapid pulse over 120 bpm at rest
- High Altitude Cerebral Edema (HACE – Fluid in Brain):
- Ataxia: loss of physical coordination, manifested as an inability to walk in a straight line or stumbling like an intoxicated person
- Extreme confusion, disorientation, and inability to answer simple questions (such as what day it is or where you are)
- Slurred speech, severe lethargy, and irrational behavior
- Hallucinations, blurred vision, and loss of consciousness
Both HAPE and HACE are medical emergencies that will prove fatal within hours without immediate descent to lower elevations.
Part 3: Prevention Protocol for a Rapid-Ascent Itinerary
Because you do not have time to acclimatize naturally, you must follow strict medical and behavioral protocols:
1. Prophylactic Medication (Diamox / Acetazolamide)
We strongly recommend consulting your travel physician before leaving home about taking Acetazolamide (Diamox) prophylactically for this trip.
- How It Works: Diamox is a carbonic anhydrase inhibitor. It mildly acidifies your blood, which signals your brainstem to increase ventilation (breathing deeper and faster), especially while asleep. This speeds up natural acclimatization and keeps nighttime oxygen saturation levels higher.
- Standard Regimen: A standard preventative dose is 125 mg to 250 mg taken twice daily, starting 24 hours before your morning flight from Kathmandu and continuing through Day 2 until you return to Kathmandu.
- Side Effects: Diamox is a mild diuretic (you will urinate more frequently), causes harmless tingling in your fingers, toes, and lips, and makes carbonated beverages taste flat.
- Contraindication: If you have a known allergy to sulfur-based medications, you cannot take Diamox.
2. Aggressive Hydration (4 to 5 Liters Daily)
Hyperventilating in freezing, dry mountain air extracts massive amounts of moisture from your respiratory system. Dehydration thickens your blood, worsens headaches, and drastically accelerates AMS. Drink 4 to 5 liters of warm water, garlic soup, and electrolyte-rich fluids from the moment you wake up on Day 1 until you leave on Day 2.
3. Strict 50% Pace Rule
When walking from Gorak Shep to Base Camp and back, walk at half your normal speed. Take short, rhythmic steps. If your breathing becomes labored to the point where you cannot hold a calm conversation with your guide, you are moving too fast. Stop, take five deep breaths, and slow down your pace.
4. Zero Alcohol and Zero Sleeping Pills
Do not drink alcohol before or during this trip. Alcohol severely dehydrates your system and acts as a respiratory depressant. Sleeping pills (such as Ambien, Valium, or benzodiazepines) suppress breathing during the night, leading to dangerous drops in blood oxygen saturation while sleeping at 5,164 meters.
Part 4: The Non-Negotiable Descent Protocol
Safety on this itinerary is defined by an absolute willingness to descend early if your body rejects the elevation.
The Three Golden Rules:
- Any sickness at 5,000 meters is altitude sickness until proven otherwise.
- Never hike higher with persistent or worsening symptoms of AMS.
- If symptoms worsen, the only true treatment is immediate descent.
How an Early Descent Works on This Itinerary:
- The Foot Descent to Lobuche (4,940m) or Pheriche (4,371m): If your guide determines at Gorak Shep that you are developing moderate AMS, the response is not to stay in bed and hope it clears. Your guide immediately takes you down the moraine trail toward Lobuche or Pheriche. Dropping even 300 to 800 vertical meters provides near-instant relief by increasing ambient oxygen pressure.
- Emergency Medical Evacuation: If severe symptoms (HAPE or HACE) appear, the guide administers emergency supplemental oxygen, stabilizes the trekker, and uses a satellite communication device to coordinate an immediate emergency helicopter evacuation directly to a private international hospital in Kathmandu.
Altitude Monitoring & Action Matrix Table
| Symptom Category | Physiological Indicators | Oxygen Saturation (SpO2) | Immediate Operational Action |
| Normal High-Altitude Response | Mild headache, elevated resting pulse, slight fatigue | 75% to 85% | Hydrate with 1L water; take paracetamol; maintain slow walking pace |
| Moderate AMS | Throbbing headache, nausea, loss of appetite, persistent dizziness | 68% to 74% | Stop ascent immediately; rest; do not trek to Base Camp; prepare to descend |
| Severe AMS / Suspected HAPE | Breathlessness at rest, wet cough, cyanotic lips, resting pulse >120 | Below 68% | Administer emergency medical oxygen; initiate immediate foot descent to lower camp |
| Critical Emergency (HAPE / HACE) | Ataxia (loss of coordination), severe confusion, rattling lungs | Critical (<65%) | Emergency supplemental oxygen; call immediate helicopter rescue to Kathmandu |
Transportation and Flight Options: 2-Day Everest Base Camp Trek by Helicopter
Transport for the 2-day Everest Base Camp trek by helicopter consists of private door-to-door vehicle transfers in Kathmandu and two high-altitude helicopter flights using an Airbus H125 (Eurocopter AS350 B3e). Day 1 flies directly from Kathmandu Domestic Airport to Gorak Shep (5,164m) in 45 to 60 minutes. Day 2 features a midday helicopter pickup from Lobuche (4,940m) flying back to Kathmandu via a brief refueling stop at Lukla. Flying by helicopter completely eliminates the grueling 5-hour overland night drive to Ramechhap Airport and avoids chronic fixed-wing Lukla flight cancellations.
This itinerary is an aviation-driven product. Understanding aircraft performance, weight limits, and weather windows helps you travel smoothly without logistical surprises.
The Aircraft: Airbus H125 (Eurocopter AS350 B3e)
Every flight on this route uses the Airbus H125, known across the aviation industry as the ultimate high-altitude workhorse. It is the exact aircraft model that made history by landing on the summit of Mount Everest in 2005.
Equipped with a Safran Arriel 2D turboshaft engine, dual hydraulics, and full FADEC engine control, the H125 is engineered specifically for extreme mountain rescues and hot-and-high conditions. It features large, unobstructed panoramic windows, giving every passenger clear views of the Khumbu peaks.
The High-Altitude Payload Rule (Why Groups Are Split)
Air density at 5,000 meters is roughly half of what it is at sea level. Because thin air cuts rotor lift, helicopters cannot carry the same weight at Gorak Shep that they carry in Kathmandu.
- Kathmandu Takeoff: At 1,400 meters, the helicopter can comfortably fly with up to 5 passengers plus luggage (a maximum payload around 450 to 500 kg).
- High-Altitude Landing & Takeoff: Above 4,500 meters, the aircraft’s safe operating payload drops to roughly 220 to 250 kg (equivalent to 2 or 3 passengers, depending on individual body weights and fuel load).
- The Shuttle System for Larger Groups: If your booking has 4 or 5 passengers, the pilot will execute a standard shuttle rotation. The helicopter flies to Pheriche (4,371m) or Syangboche (3,880m), drops off 2 passengers, and shuttles the remaining 2 or 3 passengers up to Gorak Shep first. The pilot then returns immediately to pick up the remaining group members. This shuttle takes only 12 to 15 minutes and is a mandatory legal safety protocol under Civil Aviation Authority of Nepal (CAAN) regulations.
Leg-by-Leg Flight Logistics
Outbound Flight: Kathmandu to Gorak Shep (Day 1)
- Departure: Early morning (between 6:00 AM and 6:45 AM) from the domestic terminal of Tribhuvan International Airport (TIA) in Kathmandu.
- Flight Time: 45 to 60 minutes.
- The Route: The flight heads east across the Kathmandu Valley rim, cruising over green terraced mid-hills, the Sun Koshi river basin, and past Lukla airstrip. The helicopter enters the Dudh Koshi river gorge, climbing past Namche Bazaar and Tengboche Monastery. It follows the Imja and Khumbu valleys before setting down at the unimproved helipad beside Gorak Shep (5,164m).
- Fuel Stop: If head-winds require extra fuel reserves, the pilot will make a quick 10-minute refueling stop at Lukla Airport (2,860m) before pushing up the valley.
Inbound Flight: Lobuche to Kathmandu (Day 2)
- Pickup Window: Midday (targeted between 11:00 AM and 1:00 PM, weather permitting) from the Lobuche helipad (4,940m).
- Flight Time: 45 to 60 minutes total.
- The Route: You board at Lobuche, lift out of the river moraine, and soar back down the Khumbu Valley. The pilot touches down at Lukla for a mandatory 15-minute refueling stop, then completes the 35-minute flight across the mid-hills back to Kathmandu Domestic Airport.
Luggage Allowances & Strict Weight Limits
Because every kilogram directly affects the helicopter’s safety margins at 5,000 meters, baggage rules are strictly enforced at airport check-in:
- Maximum Weight Allowance: 10 kg to 15 kg (22 to 33 lbs) total per passenger, which includes both your main duffel bag and your small daypack.
- Weigh-In at Check-in: Your bags are weighed on certified digital scales at the helicopter counter in Kathmandu. If your bags exceed the weight allowance, staff will force you to remove items.
- Free Hotel Luggage Storage: You will only need your high-altitude clothing, boots, down jacket, and personal toiletries for this 2-day trip. Pack your city clothes, hard-shell suitcases, laptops, and souvenirs into a separate bag and leave them in the secure luggage room at your Kathmandu hotel. Hotel luggage storage is completely free of charge.
Why Helicopters Beat Commercial Fixed-Wing Planes
Many travelers ask why they should pay for a helicopter rather than booking a standard commercial airplane ticket to Lukla. The operational differences are massive:
1. Avoid the Ramechhap Midnight Nightmare
During peak trekking seasons (March to May and October to November), the Civil Aviation Authority of Nepal redirects all commercial fixed-wing flights to Ramechhap Airport (Manthali) to reduce congestion at Kathmandu Airport.
- To catch an airplane, trekkers must wake up at 1:30 AM, sit in a bumpy van for 4 to 5 hours on winding mountain roads to Ramechhap, and wait in a chaotic tin-roof terminal.
- With our helicopter itinerary, you leave directly from Kathmandu International Airport’s domestic terminal, barely 20 minutes from central Thamel.
2. Skips 8 Days of Uphill Walking
Commercial planes only land at Lukla (2,860m). Reaching Everest Base Camp from Lukla on foot takes at least eight days of continuous hiking. Our helicopter drops you straight into Gorak Shep at 5,164m, putting you at the doorstep of Base Camp on your very first morning.
3. Superior Weather Flexibility
Lukla’s short sloping runway requires cloudless visual conditions. If a low cloud bank sits over the runway, fixed-wing planes are grounded for days. Helicopters have vastly superior maneuverability: they can fly through narrower valley contours, hold hovering positions, and land in conditions that shut down fixed-wing airlines completely.
Ground Transport in Kathmandu
All road transfers in Kathmandu are included in your package:
- Day 1 Departure: A private, air-conditioned car, SUV, or microbus picks you up directly from your hotel lobby in Thamel, Lazimpat, or surrounding areas at 5:30 AM and drops you at the domestic helicopter lounge.
- Day 2 Arrival: Upon landing back at Kathmandu Airport, our airport coordinator meets you at the arrivals gate and transfers you directly back to your hotel in a private vehicle.
Transport & Flight Summary Table
| Travel Leg | Mode of Transport | Duration | Luggage Cap | Key Notes |
| Hotel → Kathmandu Airport | Private air-conditioned car/van | 20–30 minutes | No limit | 5:30 AM early morning pickup |
| Kathmandu → Gorak Shep (Day 1) | Airbus H125 Chartered Helicopter | 45–60 minutes | 10–15 kg per person | Lands directly at 5,164m; direct flight |
| Lobuche → Kathmandu (Day 2) | Airbus H125 Chartered Helicopter | 45–60 minutes | 10–15 kg per person | Includes 15-min refueling stop at Lukla |
| Kathmandu Airport → Hotel | Private air-conditioned car/van | 20–30 minutes | No limit | Direct drop-off at your hotel door |
Group Size and Staff Ratios: 2-Day Everest Base Camp Trek by Helicopter
Group size for the 2-day Everest Base Camp trek by helicopter is strictly capped at 2 to 5 passengers, with private charters of 1 to 3 travelers being the most common format. Unlike commercial trekking groups that march 15 to 20 people down the trail, this itinerary operates with small, agile groups. This cap is dictated by strict high-altitude helicopter payload limits at 5,000 meters and the critical medical need for intensive 1:1 or 1:2 guide-to-trekker safety monitoring.
You are landing directly in an extreme high-altitude environment without acclimatization. Massive tour groups are impossible to manage safely on this kind of itinerary.
Why Group Size Is Capped at 5 Passengers
There are two non-negotiable reasons why this trip is never operated with large groups:
1. High-Altitude Helicopter Payload Caps
At sea level, an Airbus H125 helicopter can carry five adult passengers plus luggage. At 5,164 meters (Gorak Shep), the thin air reduces engine power and rotor lift by roughly 50%.
- The aircraft cannot safely lift a full 5-passenger cabin out of the moraine.
- If a group has 4 or 5 passengers, the pilot must split the group into two shuttle rotations from Pheriche or Syangboche (lifting 2 or 3 passengers per flight).
- Capping groups at a maximum of 5 keeps shuttle delays to under 15 minutes, ensuring the entire group reaches Gorak Shep together during the stable early-morning weather window.
2. High-Altitude Medical Monitoring
Dropping from Kathmandu straight into 5,164 meters causes immediate physiological strain. A single guide cannot safely monitor ten people on shifting glacial moraine.
- A guide needs to hear how you are breathing, watch how your feet land on loose rocks, and look directly into your eyes for signs of confusion, lethargy, or ataxia (loss of coordination).
- Keeping groups small guarantees direct, one-on-one medical supervision from the moment you land until you board the helicopter at Lobuche.
Booking Formats Available
1. Private Helicopter Charters (1 to 3 Passengers) – Most Popular
The vast majority of travelers book this itinerary as a private charter.
- You have exclusive use of the helicopter, your own dedicated high-altitude guide, and a completely private itinerary.
- You set your own walking pace between Gorak Shep and Base Camp. You can stop for photos whenever you want, take longer tea breaks, and adjust departure times with your pilot based on real-time weather.
- Highly recommended for couples, close friends, or experienced solo travelers who want total flexibility and maximum safety.
2. Small Shared Departures (2 to 4 Passengers)
For solo travelers or pairs who want to share aircraft charter costs, we operate small group departures capped at four or five passengers.
- You share the helicopter flight and evening lodge dining room with like-minded, medically fit hikers.
- Pacing on the trail is calibrated to the group’s slowest walker to prevent anyone from over-exerting themselves in the thin air.
High-Altitude Guide-to-Client Ratios
We maintain the tightest guide-to-client safety ratios in the Himalayas for this product:
- 1 to 3 Trekkers: 1 Lead High-Altitude Mountain Guide.
- 4 to 5 Trekkers: 1 Lead Guide + 1 Assistant Guide.
The Assistant Guide Contingency Rule
For any group larger than three people, an assistant guide is automatically deployed. This is a critical safety mechanism:
- If one trekker develops Acute Mountain Sickness (AMS) or severe fatigue at Gorak Shep, the assistant guide can immediately escort that person down the moraine trail toward Lobuche or Pheriche to thicker air.
- Meanwhile, the lead guide continues to Everest Base Camp with the remaining healthy trekkers.
- No one is ever left alone on the trail, and one person feeling sick does not force the entire group to abort their trip.
Group Size & Safety Allocation Table
| Group Size | Aircraft Configuration | Lead Guide | Assistant Guide | Emergency Oxygen | Luggage Allowance |
| 1 Person (Solo) | Dedicated private charter | 1 Guide | None | 1 Full medical bottle | 15 kg (33 lbs) |
| 2 People | Private charter / shared seat | 1 Guide | None | 1 Full medical bottle | 15 kg per person |
| 3 People | Private charter / shared seat | 1 Guide | None | 1 Full medical bottle | 12–15 kg per person |
| 4 People | Shared group (1 shuttle split) | 1 Lead Guide | 1 Assistant Guide | 2 Medical bottles | 10–12 kg per person |
| 5 People | Shared group (1 shuttle split) | 1 Lead Guide | 1 Assistant Guide | 2 Medical bottles | 10 kg per person |
Solo Travelers on This Itinerary
If you are a solo traveler, you have two options:
- Book a Solo Private Charter: You pay for the exclusive use of the aircraft. It is the most expensive option, but it guarantees your departure date and gives you dedicated one-on-one care from your mountain guide and pilot.
- Join an Existing Small Group Departure: If we have an existing 2 or 3 person departure scheduled on your preferred dates, you can book a single seat to share the helicopter charter cost. Solo travelers joining a group must complete a mandatory high-altitude medical fitness questionnaire before their booking is confirmed.
Equipment - built for expedition conditions, not a casual day hike
Because this trip puts you at extreme altitude with essentially no acclimatization, the gear list runs considerably heavier than what you’d bring on a lower-altitude trek.
Clothing
- Down jacket
- Thermal base layers, top and bottom
- Fleece mid-layer
- Waterproof, windproof outer shell
- Warm trekking trousers
- Thermal leggings
- Warm hat
- Neck warmer or buff
- Gloves, plus a spare pair
- Warm socks, several pairs
Footwear
- High-quality, broken-in trekking boots
- Wool or synthetic trekking socks
- Microspikes or crampons, if trail conditions call for them at the time
High-altitude gear
- Sleeping bag rated for sub-zero temperatures
- Headlamp with spare batteries
- Trekking poles
- Sunglasses with strong UV protection – the glare off the glacier and snow is intense
- High-SPF sunscreen
- Lip balm
- Water bottles or a thermos
- Personal first-aid kit
- Any personal medication, clearly labeled, with enough for the full trip
- Water purification tablets or a filtration system
Communication and emergency equipment
- Satellite communication device or equivalent
- GPS or navigation backup
- A proper first-aid kit carried by the guide
- Pulse oximeter, for checking blood oxygen levels along the way
- Emergency oxygen, where operationally appropriate and carried by the guide team
- A clear, agreed emergency evacuation procedure before you set off
- Local emergency contact numbers on hand
None of this equipment eliminates altitude risk. It manages it, and it helps a trained guide catch problems early – but it doesn’t turn a genuinely serious high-altitude exposure into a safe one on its own. That framing matters and shouldn’t get lost in a gear list.
Food and hydration
At this altitude, simple food that’s easy to digest matters more than variety. Typical meals include soup, dal bhat, rice, pasta, potatoes, noodles, eggs, bread, and porridge, along with plenty of hot tea and hot water. Electrolytes are worth carrying and using, since dehydration compounds altitude effects and is easy to underestimate when it’s cold enough that you don’t feel as thirsty as you actually are. This isn’t the trip for a heavy, indulgent dinner – keep meals light, warm, and frequent rather than large and infrequent.
The AMS Section (Add this right after the "Food and hydration" section)
Acute Mountain Sickness (AMS): The Reality and How to Prevent It Acute Mountain Sickness (AMS) happens when your body doesn’t get enough oxygen. On a normal trek, you walk slow and let your blood adjust. On this trip, you fly straight into the danger zone. That makes AMS the single biggest risk of this itinerary.
Symptoms usually start as a dull headache. Then comes nausea, dizziness, and extreme fatigue. If it hits hard, fluid can build up in your lungs or brain—which is a critical medical emergency.
How to prevent it on a rapid-ascent trip:
- Hydrate like it’s a job: Drink 4 to 5 liters of water a day. Dehydration masks and worsens altitude sickness.
- Move slowly: When you step out of the helicopter at Gorak Shep, do not rush. Walk at half your normal speed. Everything takes more effort up here.
- Talk to your doctor about Diamox: Many climbers take Acetazolamide (Diamox) prophylactically to speed up acclimatization. Get professional medical advice before you fly.
- Don’t hide your symptoms: If your head hurts, tell your guide immediately. Don’t try to tough it out.
The golden rule? If symptoms appear and get worse, you don’t push through. You descend. Immediately.
The Overnight Add-ons
Gokyo Lake & Hotel Everest View If you want to stretch this trip out and see more of the Khumbu without walking for two weeks, you can add overnight helicopter stops to the itinerary. Here is exactly what that looks like and what it costs.
- Gokyo Lake Overnight (Add $1,000 per person) Instead of flying straight back to Kathmandu from Lobuche, the helicopter swings over into the Gokyo Valley. You land near the turquoise glacial lakes and spend the night surrounded by some of the sharpest peaks in the Himalayas. The $1,000 covers the extra helicopter routing, the overnight stay, and the sheer privilege of waking up to a Gokyo sunrise before flying back to Kathmandu on day three.
- Hotel Everest View Overnight (Add $750 per person) Want a touch of luxury at 3,880m? We can route your return flight to drop you at the famous Hotel Everest View in Syangboche. It costs $250 for the room, plus a $500 per person surcharge for the helicopter diversion. You get a real bed, incredible food, and a panoramic view of Everest right from your terrace. You fly back to Kathmandu the following morning.
For travelers who want more of the Khumbu without turning this into a full multi-week trek, there’s a longer version built around the Gokyo Valley – a genuinely spectacular part of the region, with a chain of turquoise glacial lakes ringed by some of the highest peaks on Earth. It’s one of the standout destinations inside Sagarmatha National Park in its own right.
This isn’t just Gokyo bolted onto the same two-day schedule. Trying to combine Base Camp, Gokyo, and multiple helicopter legs into one impossibly compressed itinerary isn’t realistic or safe – Gokyo deserves its own additional day, not a rushed afternoon squeezed in on the way to a helicopter pickup.
Everest Base Camp + Gokyo, 3 days / 2 nights
Day 1: Kathmandu, helicopter to the Gorak Shep area, trek to Everest Base Camp, return to Gorak Shep. Overnight at Gorak Shep.
Day 2: Gorak Shep to Lobuche, helicopter to the Gokyo region (subject to routing and landing approval on the day). Overnight near Gokyo Lake.
Day 3: Sunrise at Gokyo Lake, time to explore the area, helicopter back toward Kathmandu, weather and landing conditions permitting.
The Gokyo leg should stay flexible in how it’s sold. Helicopter operations at this altitude, in this terrain, can’t be treated like a scheduled taxi service that runs on a fixed clock – building in that flexibility upfront is what makes the product honest rather than something that sets unrealistic expectations.
How this compares to other ways of seeing Everest Base Camp
| Option | Duration | Altitude reached | Acclimatization | Physical demand | Best for |
|---|---|---|---|---|---|
| This 2-day heli-supported trek | 2 days / 1 night | 5,364m (EBC) | Minimal – direct high-altitude arrival | High – real trekking at extreme altitude with no buildup | Experienced, fit, high-altitude travelers on a tight schedule |
| Classic EBC trek | 12-14 days | 5,364m (EBC), often + Kala Patthar | Full – built-in acclimatization days | Moderate, spread over many days | Most trekkers, including first-timers with reasonable fitness |
| EBC trek with helicopter return | 10-12 days | 5,364m (EBC) | Full on the way up | Moderate on the way up, none on the return | Trekkers wanting the full acclimatized experience without the multi-day walk back down |
| One-day EBC helicopter sightseeing tour | Half a day | Landing near Gorak Shep or a permitted viewpoint, no trekking to EBC itself | None needed – very short exposure | Very low – sit and fly | Travelers with limited time who don’t need to set foot at Base Camp itself |
The two-day heli-supported trek sits in a category of its own: it’s the only option on this list that gets you standing at Base Camp itself without either the full acclimatized trek or a total absence of physical effort. That middle ground is exactly what makes it valuable to the right traveler, and exactly why it’s not appropriate for everyone.
Suggested product positioning
“2-Day Everest Base Camp High-Altitude Trek by Helicopter — Gorak Shep Overnight & Lobuche Helicopter Pickup”
Highlights worth leading with:
- Helicopter access into the Everest region straight from Kathmandu
- A genuine high-altitude arrival in the Khumbu, not a flyover
- A guided trek to Everest Base Camp on foot, the way it’s meant to be reached
- One night of high-altitude camping or basic lodge accommodation
- Standing at Everest Base Camp, roughly 5,364m
- Close views of the Khumbu Glacier and the surrounding Himalayan wall
- An early-morning descent trek toward Lobuche
- Helicopter pickup from Lobuche, weather permitting
- An experienced local high-altitude guide throughout
- A clear emergency plan and ongoing altitude monitoring
- Genuine, once-in-a-while photography opportunities in a landscape most people never get to stand in
The core message, worth repeating on the site itself: this isn’t sold as a shortcut for everyone. It’s a specialized, physically demanding, helicopter-supported Everest experience built for travelers who are already prepared for what high altitude actually asks of a body.
Safety, Security, and Mandatory Travel Insurance: 2-Day Everest Base Camp Trek by Helicopter
“2-Day Everest Base Camp High-Altitude Trek by Helicopter — Gorak Shep Overnight & Lobuche Helicopter Pickup”
Highlights worth leading with:
• Helicopter access into the Everest region straight from Kathmandu
• A genuine high-altitude arrival in the Khumbu, not a flyover
• A guided trek to Everest Base Camp on foot, the way it’s meant to be reached
• One night of high-altitude camping or basic lodge accommodation
• Standing at Everest Base Camp, roughly 5,364m
• Close views of the Khumbu Glacier and the surrounding Himalayan wall
• An early-morning descent trek toward Lobuche
• Helicopter pickup from Lobuche, weather permitting
• An experienced local high-altitude guide throughout
• A clear emergency plan and ongoing altitude monitoring
• Genuine, once-in-a-while photography opportunities in a landscape most people never get to stand in
The core message, worth repeating on the site itself: this isn’t sold as a shortcut for everyone. It’s a specialized, physically demanding, helicopter-supported Everest experience built for travelers who are already prepared for what high altitude actually asks of a body.
Permits and fees
The 2-day Everest Base Camp trek by helicopter requires two mandatory government permits: the Sagarmatha National Park Entry Permit (NPR 3,000 / ~$23 USD) and the Khumbu Pasang Lhamu Rural Municipality Entry Permit (NPR 3,000 / ~$23 USD). Total permit costs come to NPR 6,000 (roughly $46 USD) per person. Arriving by helicopter does not exempt you from local conservation fees; both permits must be arranged and issued in Kathmandu before takeoff and are inspected by park authorities upon touchdown at Gorak Shep.
Because you land directly at 5,164 meters where there are no government permit sales counters, all paperwork must be verified and cleared in advance.
Part 1: The Two Mandatory Permits Explained
Every trekker setting foot inside the Khumbu region must hold two separate documents issued by federal and local authorities.
1. Sagarmatha National Park Entry Permit (SNP)
- Cost: NPR 3,000 (~$23 USD) for foreign nationals; NPR 1,500 for SAARC citizens (plus 13% government VAT). Children under 10 enter free.
- Issuing Authority: Department of National Parks and Wildlife Conservation (DNPWC), Government of Nepal.
- Why You Need It: Sagarmatha National Park is a protected UNESCO World Heritage Site covering 1,148 square kilometers from the Dudh Koshi gorges up to the summit of Mount Everest. The fee directly funds trail conservation, high-altitude waste management, forest preservation, and wildlife protection.
- Where It Is Verified: Inspected by national park rangers and army personnel at Gorak Shep and verified against flight passenger manifests.
2. Khumbu Pasang Lhamu Rural Municipality Entry Permit
- Cost: NPR 3,000 (~$23 USD) for foreign nationals; NPR 2,000 for SAARC citizens.
- Issuing Authority: Khumbu Pasang Lhamu Rural Municipality (the local district government of the Everest region).
- Why You Need It: This is a local regional tax that replaced the old Trekkers’ Information Management System (TIMS) card in the Everest region. The revenue stays directly in the Khumbu, funding emergency trail rescue infrastructure, suspension bridge maintenance, and local Sherpa community health clinics.
- Where It Is Verified: Logged by municipal tourism officers at Gorak Shep and Lobuche.
Part 2: The “Aerial Arrival” Reality (No Exceptions for Helicopter Flyers)
A common misconception among travelers is that taking a helicopter to Everest Base Camp bypasses standard trekking permits. It does not.
- Zero Exemption for Short Visits: Whether you walk into the park over fourteen days or fly directly to Gorak Shep for an overnight stay, the legal entry requirement is identical. Every foreign citizen stepping onto the ground inside the park boundaries must be registered.
- Ranger Inspections on the Ground: Park rangers actively monitor the helipads at Gorak Shep and Lobuche. Your guide carries the physical permit dossier. Arriving without pre-arranged permits results in an immediate 100% penalty fine and can cause authorities to deny you permission to leave the landing pad.
- TIMS Card Notice: You do not need a separate TIMS (Trekkers’ Information Management System) card for this trip. The Khumbu Pasang Lhamu Rural Municipality withdrew from the central TIMS system and enforces its own municipal permit exclusively.
Part 3: Required Documents & Paperwork Checklist
To issue your permits in Kathmandu before your morning flight, we require:
- A Clear Passport Copy: Must be valid for at least 6 months beyond your travel dates.
- Two Passport-Sized Photographs: Or clear, high-resolution digital headshots sent via WhatsApp or email.
- Emergency Travel Insurance Details: Policy number, insurer name, and 24-hour emergency medical evacuation assistance hotline covering up to 6,000 meters.
- Nepal Tourist Visa Copy: Can be provided upon arrival at Tribhuvan International Airport in Kathmandu.
For travelers booking the full 2-day package with Adventure Master Trek, all permit fees, municipal taxes, and administrative processing are included in your total trip price. Our team collects the stamps and paperwork in Kathmandu so you proceed straight to the helicopter departure lounge on Day 1.
Permit Cost & Verification Summary Table
| Permit Name | Foreign Nationals Cost | SAARC Nationals Cost | Issuing Body | Where Verified |
| Sagarmatha National Park Permit | NPR 3,000 (~$23 USD) | NPR 1,500 (~$11 USD) | Federal Government (DNPWC) | Inspected at Gorak Shep helipad |
| Khumbu Rural Municipality Permit | NPR 3,000 (~$23 USD) | NPR 2,000 (~$15 USD) | Khumbu District Government | Logged at Gorak Shep / Lobuche |
| TIMS Registration Card | Not Required | Not Required | Replaced by local permit | N/A in Everest Region |
| Total Permit Cost Per Person | NPR 6,000 (~$46 USD) | NPR 3,500 (~$26 USD) | Valid for duration of stay | Included in package |
Environmental Regulations at 5,000 Meters
Operating inside Sagarmatha National Park comes with strict environmental rules that every traveler must respect:
- Single-Use Plastic Ban: Khumbu Pasang Lhamu Rural Municipality strictly bans the import, sale, and use of single-use plastic water bottles, plastic shopping bags, and non-biodegradable drink containers under 30 microns. You must bring reusable aluminum, steel, or Nalgene water bottles.
- Strict Drone Restrictions: Flying a recreational camera drone at Gorak Shep or Everest Base Camp is illegal without three separate government permits: from the Civil Aviation Authority of Nepal (CAAN), the Ministry of Home Affairs, and Sagarmatha National Park. Unpermitted drones are confiscated on the spot by army patrols, accompanied by heavy cash fines.
- Leave No Trace on the Glacier: The Khumbu Glacier is an active, fragile water source. All trash, personal hygiene items, and battery waste must be packed out and returned to Kathmandu.
Booking and cancellation
To confirm a booking with Adventure Master Trek, a non-refundable 30% advance deposit is required for all Nepal treks and day tours (50% for Tibet and Bhutan trips), with the remaining balance payable upon arrival in Kathmandu prior to departure. Cancellations submitted in writing 20 or more days before the trip start date receive a full refund of payments made above the deposit; cancellations under 20 days, no-shows, or early departures on trail are strictly non-refundable. You can reschedule your trip dates up to 20 days prior for a $200 USD per person fee.
Because mountain logistics (domestic flights, park permits, guide assignments, and helicopter standby slots) are secured and prepaid well in advance, our policies protect both your travel investment and local staff commitments.
Part 1: Booking Confirmation and Payment Methods
Securing your trekking dates requires completing the registration form and submitting the required deposit.
Deposit Requirements
- Nepal Treks and Day Tours: 30% advance deposit per person at the time of booking.
- Tibet and Bhutan Expeditions (e.g., Mount Kailash): 50% advance deposit per person due to strict cross-border visa and permit issuance regulations.
- Last-Minute Bookings (Within 10 Days of Departure for Nepal / 20 Days for Tibet): Require 100% full payment upfront upon booking and are completely non-refundable.
Balance Payment
The remaining balance must be cleared before the trip departs:
- Cash in Kathmandu: USD, EUR, GBP, AUD, or Nepalese Rupees (NPR) calculated at the official Nepal Rastra Bank exchange rate on the day of payment.
- Credit / Debit Card (Visa or MasterCard): Accepted at our Kathmandu office or via our secure online payment link. Note that a standard 4% bank merchant processing fee applies to all card transactions.
- Bank Wire Transfer: Must be initiated at least 15 business days prior to arrival to ensure international clearing. All sender and intermediary bank wire fees are the responsibility of the client.
Part 2: Cancellation Policy & Refund Tiers
All cancellation requests must be delivered in writing via email. The cancellation date is calculated based on the timestamp when our Kathmandu office receives your written notice (Nepal Standard Time, GMT +5:45).
Cancellation Policy Table
| Trip Destination | Notice Given Before Departure | Retained by Company | Amount Refunded to Client |
| Nepal Treks & Tours | 20 or more days | 30% deposit | 100% of balance paid beyond deposit |
| Nepal Treks & Tours | Less than 20 days | 100% of total trip cost | No refund (0%) |
| Tibet & Bhutan Trips | 30 or more days | 50% deposit | 100% of balance paid beyond deposit |
| Tibet & Bhutan Trips | Less than 30 days | 100% of total trip cost | No refund (0%) |
| Any Trip | After trip commences | 100% of total cost | No refund (0%) |
| Any Trip | No-show on departure date | 100% of total cost | No refund (0%) |
Part 3: Rescheduling and Trip Transfers
If an unexpected personal emergency, illness, or work conflict prevents you from traveling on your booked dates, we allow you to reschedule or transfer your booking instead of forfeiting your trip.
Rescheduling Your Dates
- Nepal Treks: You must notify us in writing at least 20 days before your original start date. A rescheduling administrative fee of $200 USD per person applies. Your deposit remains valid for any new departure date within 12 months.
- Tibet and Bhutan Expeditions: You must notify us in writing at least 30 days before departure. A rescheduling fee of $500 USD per person applies to cover canceled Tibet Tourism Bureau (TTB) visa clearances and non-refundable border permits.
- Under the Notice Threshold: Date changes requested less than 20 days before departure for Nepal (or 30 days for Tibet/Bhutan) are treated as late cancellations and follow the standard cancellation table above.
Transferring to Another Person
You can transfer your booking to a friend, family member, or replacement traveler, provided they meet the medical and physical eligibility requirements of the itinerary. You are responsible for finding the replacement traveler. The same notice windows and transfer fees ($200 USD for Nepal / $500 USD for Tibet) apply to reissue government permits and domestic flight tickets.
Part 4: Weather Delays, Flight Disruptions & Force Majeure (Essential Additions)
Himalayan mountain travel involves operating in extreme, unpredictable weather. These additional terms apply to all mountain operations:
Domestic Flight and Helicopter Weather Holds (e.g., Lukla, Jomsom)
Commercial airplanes and scenic helicopters fly exclusively under Visual Flight Rules (VFR). If your mountain flight to Lukla, Jomsom, or Gorak Shep is delayed or canceled due to heavy fog, storm systems, or high winds:
- Adventure Master Trek will reschedule your flight for the next available morning flight window.
- If flights remain grounded for multiple consecutive days, your lead guide and trip manager will offer you an equivalent alternative trekking route (such as switching an EBC trek to the Annapurna Circuit or Langtang Valley).
- Additional accommodation, meals, and hotel expenses in Kathmandu resulting from weather delays are the traveler’s personal responsibility and are claimed through your travel insurance.
Unused Services on Trail (Early Descent)
If you choose or are medically required to end your trek early—due to Acute Mountain Sickness (AMS), injury, fatigue, or personal choice:
- There are no refunds or compensation for unused lodge nights, meals, transport, or guide days.
- Trekking packages are quoted as unified group operations; lodges, permits, and staff salaries are contracted for the full duration regardless of whether a client leaves early.
- Any extra accommodation, transport, or medical costs incurred by descending to Kathmandu earlier than the scheduled itinerary are the client’s direct responsibility.
Part 5: Mandatory Insurance & Documentation Support Guarantee
Comprehensive travel insurance is mandatory for all Adventure Master Trek departures. Your policy must cover:
- Trip cancellation, interruption, and trip curtailment.
- High-altitude emergency search, rescue, and helicopter evacuation up to 6,000 meters.
- In-hospital medical treatment and repatriation.
Our Official Insurance Claim Guarantee
If you are forced to cancel your trek before departure or abort your trip on the trail due to medical illness, severe weather, or family emergencies, Adventure Master Trek provides all official documentation required by your insurance company to recover your non-refundable expenses. We will issue:
- An official, certified cancellation confirmation letter stating non-refundable fees.
- Itemized receipts for all payments received.
- Guide incident reports and medical emergency logs for claims involving helicopter evacuations or hospital treatment.
FAQs
Your Questions, Answered
Will the helicopter actually land at Everest Base Camp itself?
No. Base Camp sits on an active glacier with no fixed helipad, so helicopters don’t land there. The standard landing and pickup point is Gorak Shep, and even that is subject to the pilot’s judgment on the day.
What about landing at Kala Patthar?
Kala Patthar landings have been restricted since a serious accident in the region in 2023, and that restriction has been described as open-ended rather than lifted. Don’t book this trip expecting a Kala Patthar landing unless your operator can confirm current status closer to your date.
How fit do I need to be?
Genuinely fit, and ideally with some prior high-altitude experience above 4,000m. This isn’t a trip to build fitness on – it’s a trip that assumes you already have it, because there’s no acclimatization buffer to absorb a rough start.
What’s the single biggest risk on this trip?
Altitude. Flying directly to roughly 5,164m gives your body essentially no time to adjust, which is the main reason this product is positioned the way it is – for experienced, medically fit travelers with a clear descent plan if anything goes wrong.
What happens if someone gets altitude sickness?
The response is to descend, not to continue. This is the accepted treatment when symptoms persist, and it’s built into the trip’s safety plan from the start.
Can beginners do this trip?
It’s not recommended. First-time high-altitude travelers are specifically flagged as not a good fit for this itinerary – the standard trek is the safer, more appropriate option.
What accommodation should I expect at Gorak Shep?
Basic, high-altitude tented or simple lodge accommodation, depending on current site arrangements and park regulations. This is not a comfort-focused stay – it’s functional, meant to keep you warm and rested before an early departure.
How long is the trek to Everest Base Camp?
Roughly three hours one way from Gorak Shep, over rough moraine terrain beside the Khumbu Glacier.
How long is the trek back to Gorak Shep?
Around two and a half to three hours, generally arriving in the late afternoon or early evening.
How long is the walk from Gorak Shep to Lobuche the next day?
A direct walk runs about two to three hours, but plan on four to six hours if you’re accounting for a slower pace or any lingering time near Base Camp.
Is the helicopter pickup time guaranteed?
No. A target window is set, usually around midday, but actual pickup depends on weather, visibility, wind, air traffic, and the pilot’s assessment on the day. It should never be sold as a fixed departure time.
What if the helicopter can’t land exactly where we’re expecting?
Pilots choose landing points based on what’s safe that day. Occasionally that means walking a short distance to wherever they’ve actually set down.
Do I need special permits for this trip?
Yes – the Sagarmatha National Park entry permit and the Khumbu Pasang Lhamu Rural Municipality permit both apply, regardless of how you arrive. A responsible operator arranges these for you in advance.
Is travel insurance required?
It should be treated as essential, not optional. Coverage needs to include high-altitude emergency evacuation specifically, along with standard medical and trip-delay coverage.
What if I’m on medication or have a health condition?
Tell your operator and your doctor before booking. Certain conditions may rule this trip out entirely, or require a doctor’s clearance beforehand.
Can I bring my own oxygen or altitude medication?
Yes, and it’s worth discussing with your doctor in advance – consult about medication such as Diamox specifically, since it’s commonly used for altitude but needs proper guidance on dosing and timing.
What’s the group size on this trip?
Kept deliberately small, and currently lower than what used to be standard for shared Everest region helicopter flights, given recent operational restrictions in the region. Confirm current group size limits with your operator at the time of booking.
What should I pack that I wouldn’t need on a lower-altitude trek?
A sub-zero rated sleeping bag, proper down insulation, a pulse oximeter if you want to monitor yourself, and satellite communication equipment carried by your guide – the gear list here is closer to expedition-level than standard trekking gear.
Can this trip be extended to include Gokyo Lake?
Yes, as a separate 3-day / 2-night version rather than squeezing Gokyo into the same two-day schedule. It adds a proper additional day to actually see the Gokyo Valley rather than rushing through it.
What time does Day 1 start?
Very early – transfer to the airport happens before sunrise, since mountain weather is most reliable in the early morning hours.
What time does Day 2 start?
Around 4:30 to 5am, with a light breakfast before setting off toward Lobuche.
What happens if the weather doesn’t cooperate on the pickup day?
The group waits, or the pickup gets rescheduled. This is treated as a normal, expected part of mountain helicopter operations, not an emergency or a failure of planning.
Is this trip suitable for photography?
Very much so, for the right traveler. Standing at Base Camp with the Khumbu Icefall, Nuptse, and Pumori around you is a genuinely rare vantage point most visitors never reach on foot in this short a timeframe.
How does this compare to just trekking the whole way?
It’s faster – two days instead of twelve to fourteen – but it comes with meaningfully more altitude risk because you skip the acclimatization that the full trek is built around. The classic trek remains the safer, more accessible option for most people.
What food should I expect at this altitude?
Simple, warm, easy-to-digest meals – soup, dal bhat, rice, noodles, eggs, porridge, and plenty of hot tea and water. Heavy or rich food isn’t recommended this high up.
Who leads the trek?
An experienced high-altitude guide, trained specifically for the demands and risks of this kind of rapid-ascent itinerary, not a general trekking guide.
What’s the emergency plan if something goes wrong?
A clear descent and evacuation plan is agreed before departure, including communication equipment, monitoring throughout the trip, and a direct line to the helicopter operator for an unscheduled pickup if genuinely needed.
Can I do this trip solo?
It’s designed around small groups with a dedicated guide rather than solo, unguided travel – given the altitude and the narrow safety margins involved, a guide is essential here, not optional.
Why shouldn’t this be marketed as guaranteed or risk-free?
Because it isn’t, and pretending otherwise does a real disservice to travelers. Landing locations, pickup times, and even whether the trip proceeds on a given day all depend on weather, aircraft performance, and current regional regulations. The honest, professional version of this product is upfront about all of that from the start.


View Our Similar Packages
Discover our top tours, loved by thousands of travelers annually. Choose the adventure that inspires you and embark on a journey tailored to your desires.
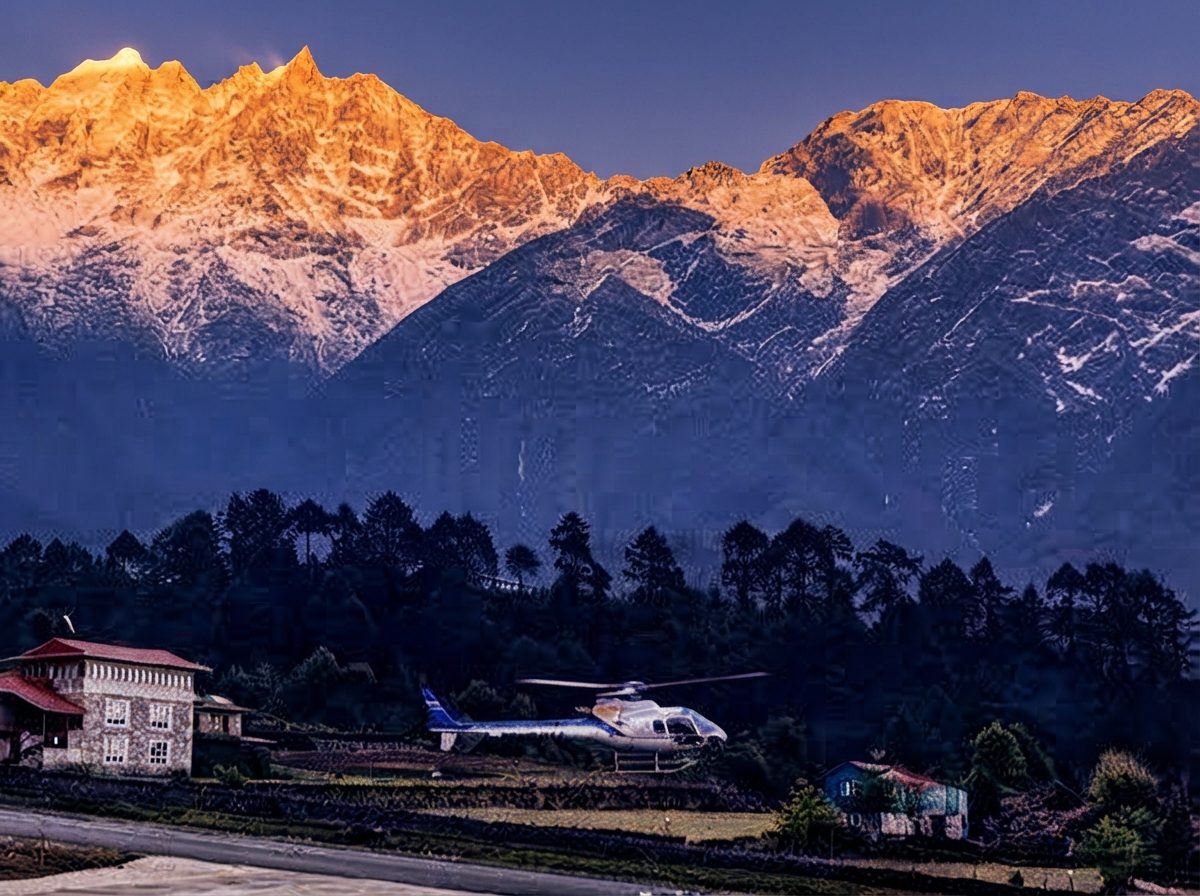

 Multi-country
 4 Days
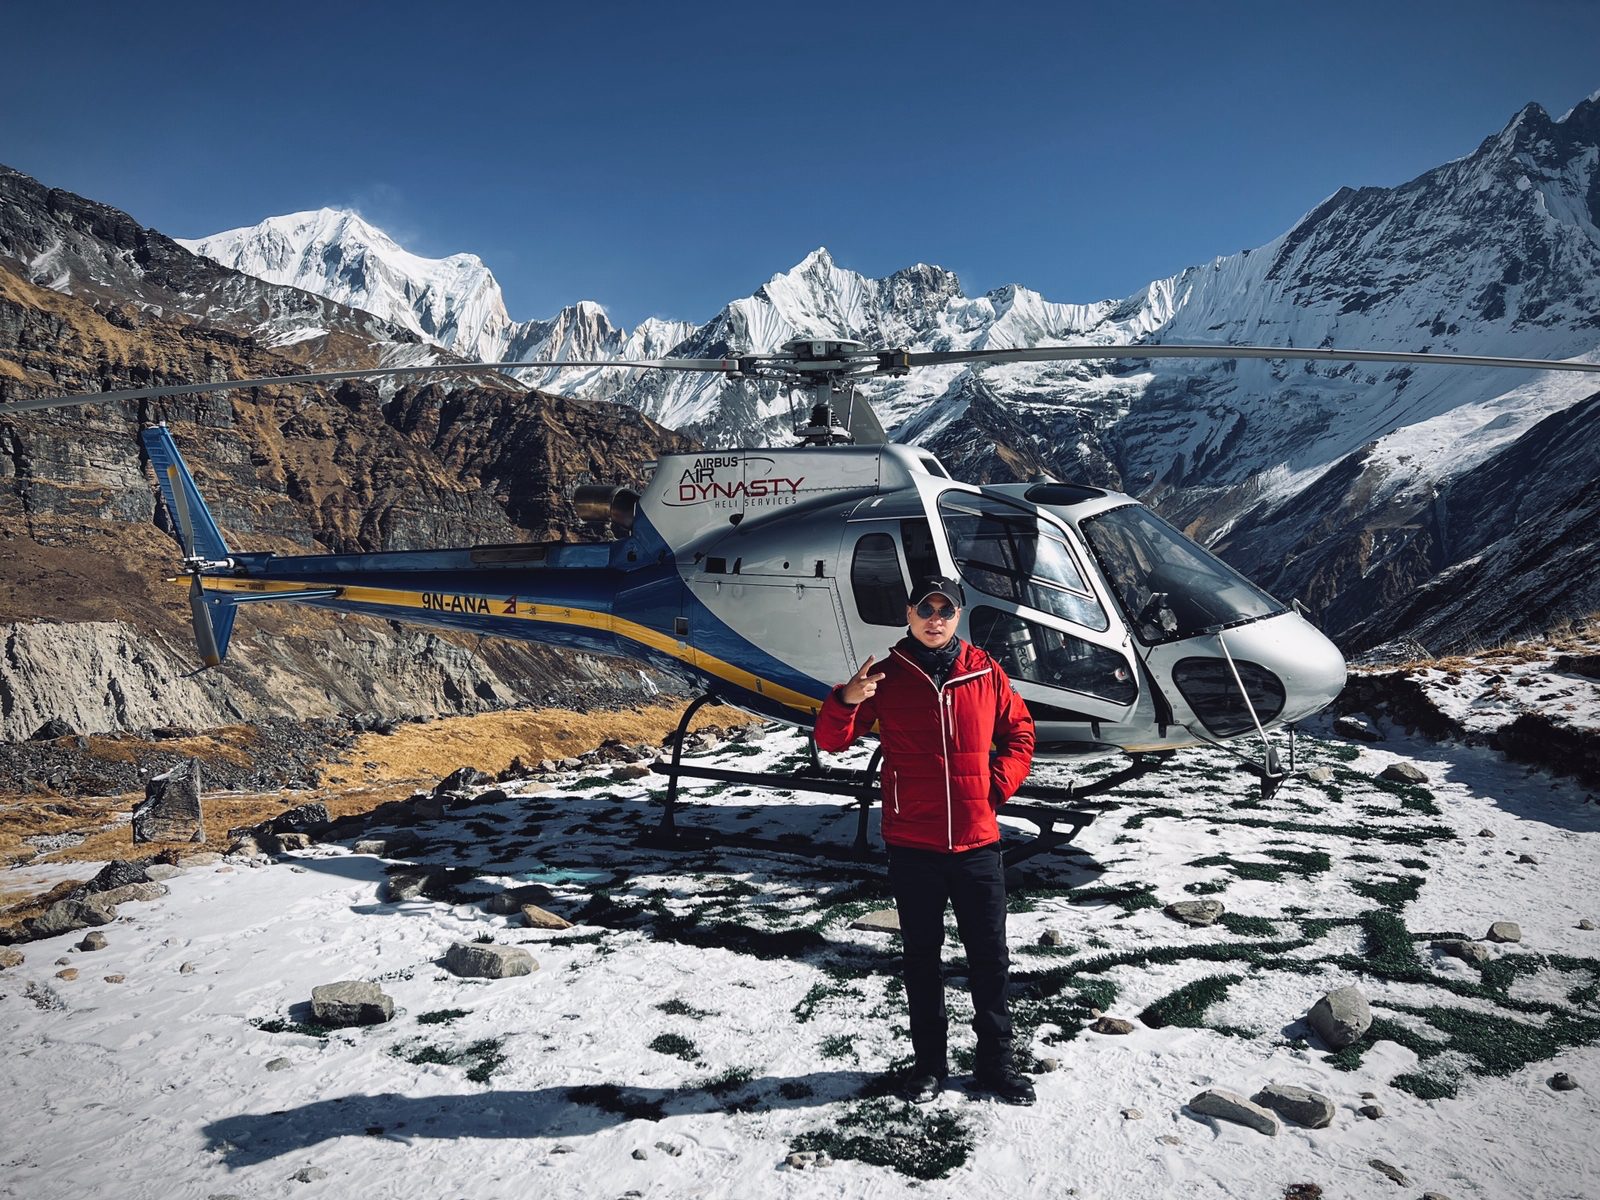
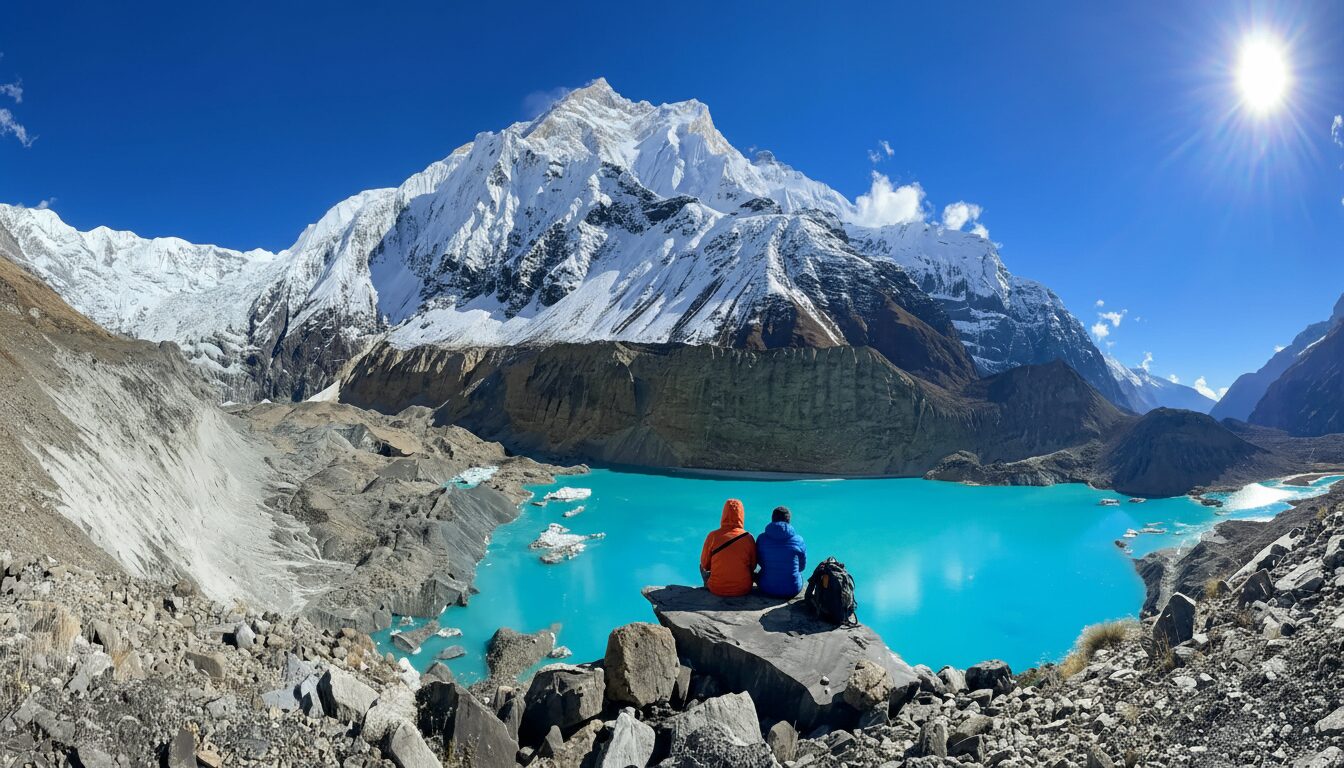
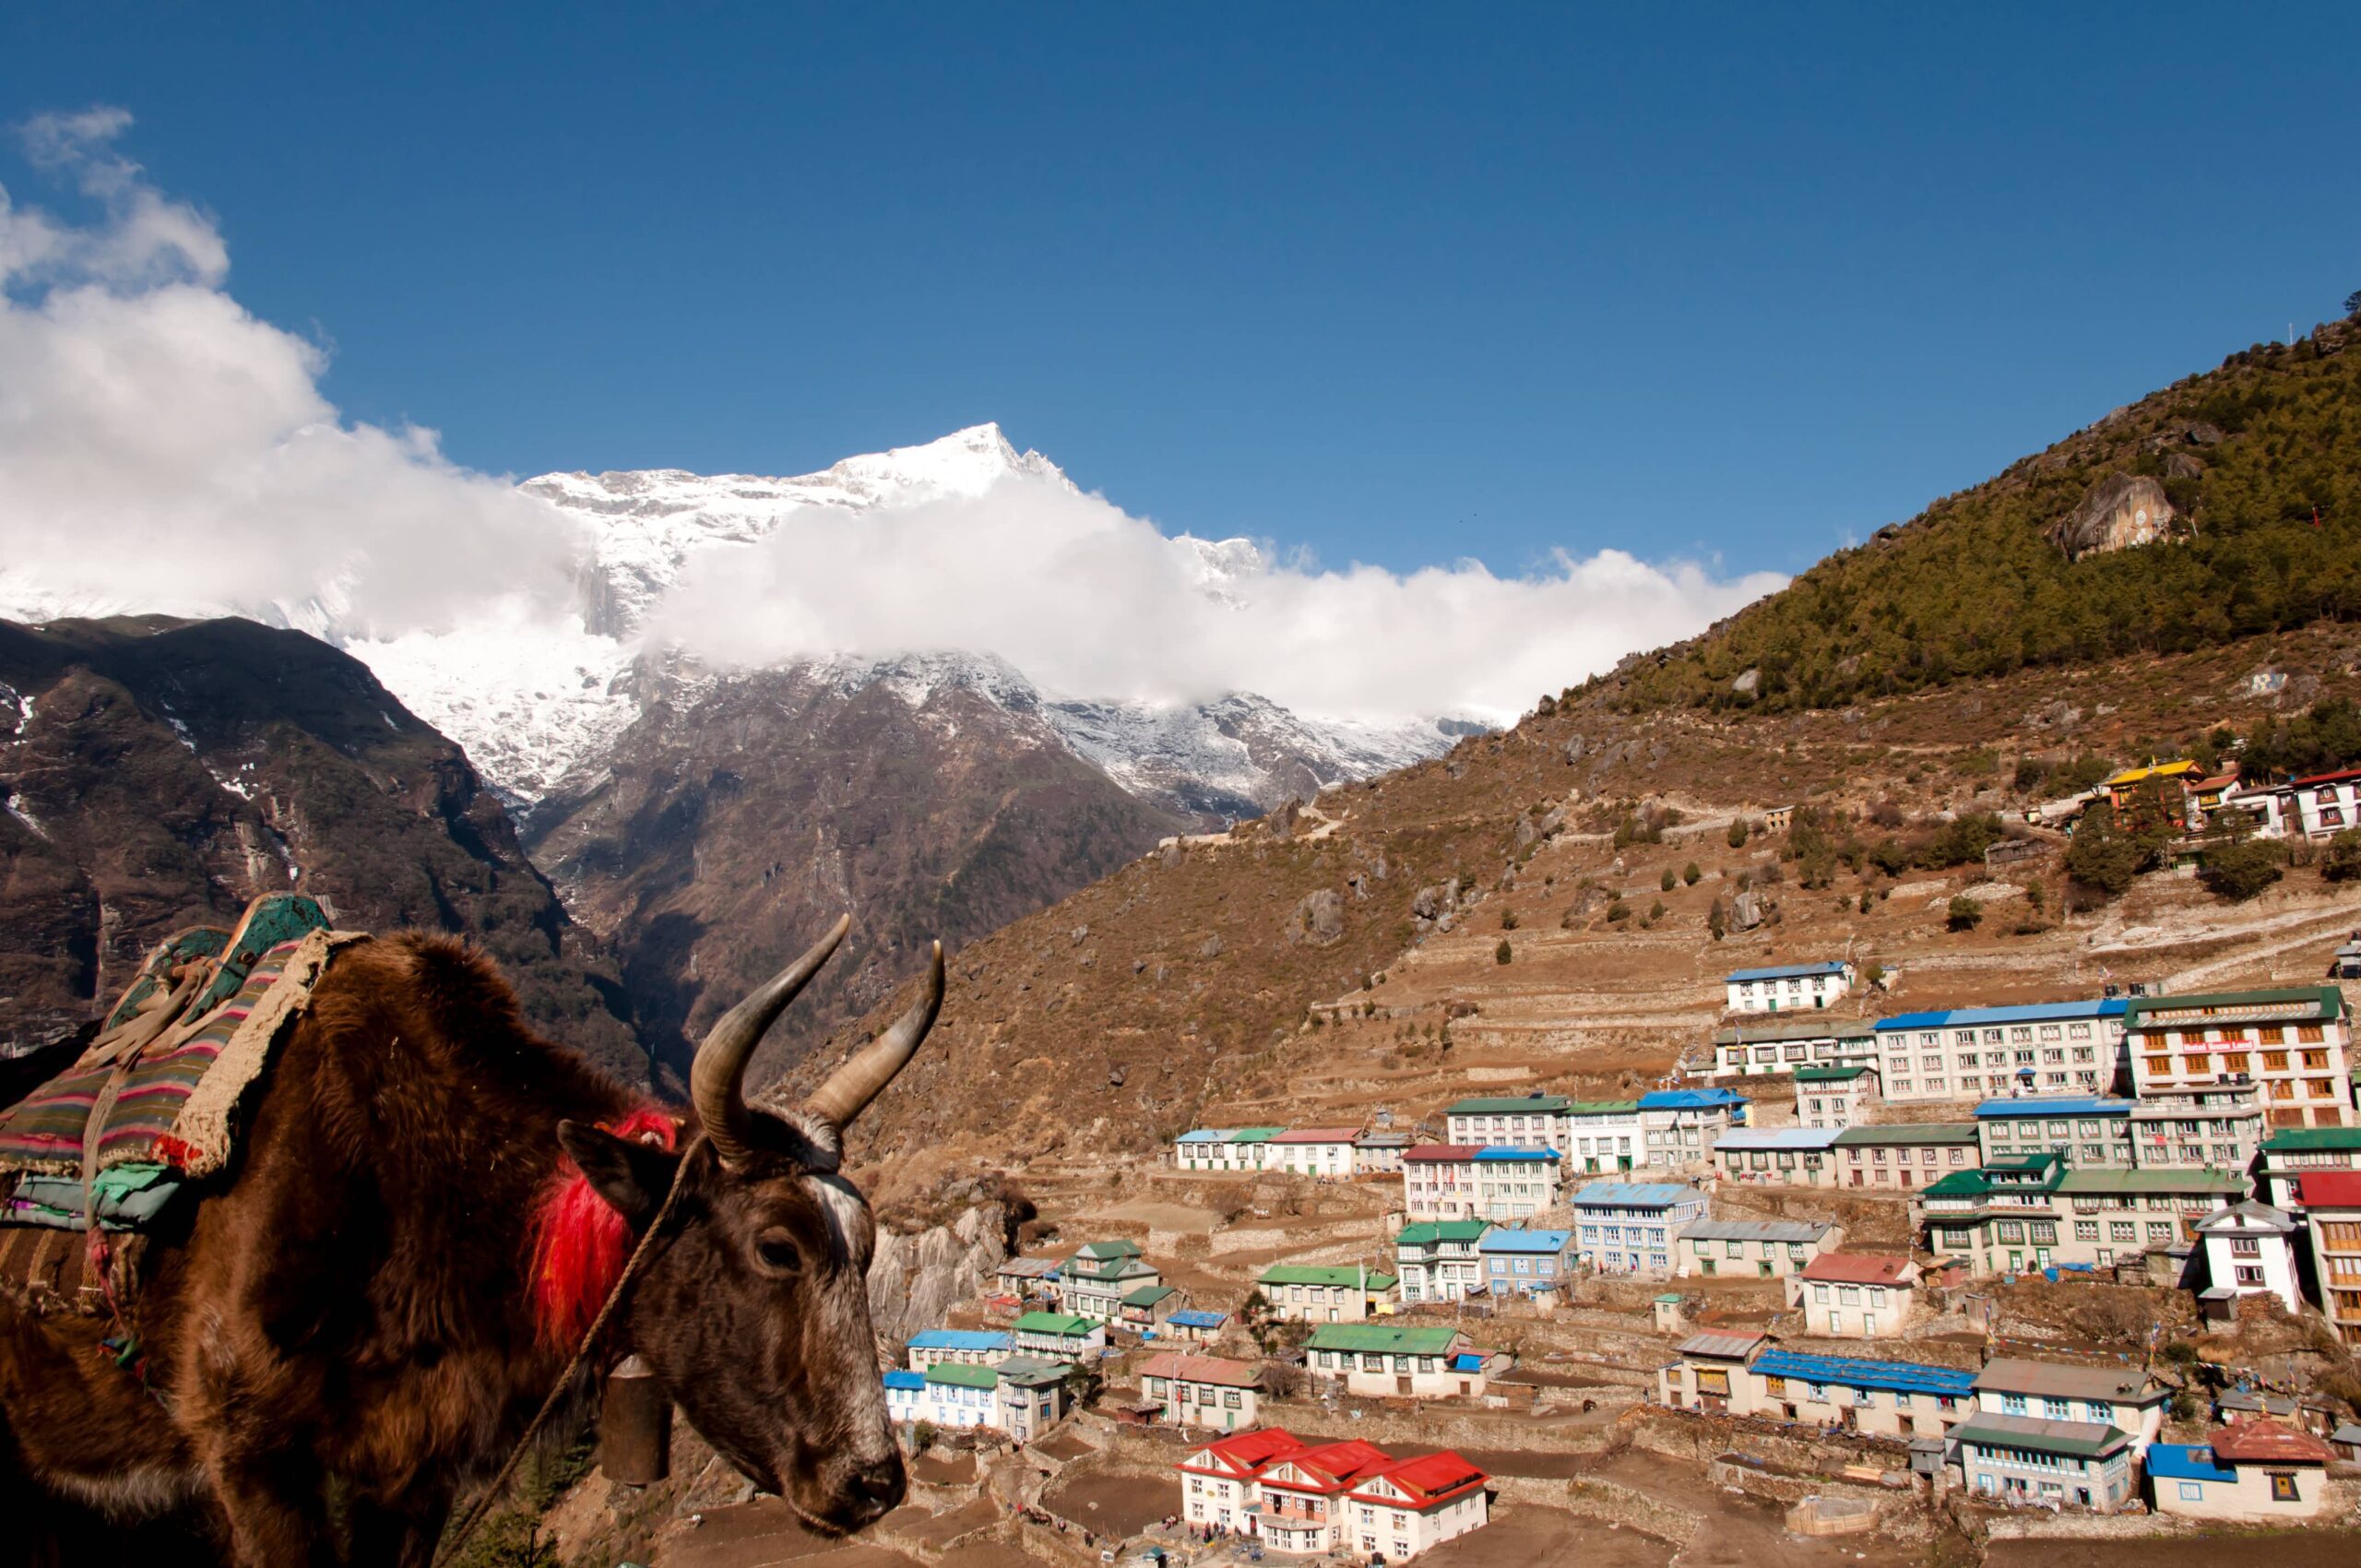
Add Review
Reviewing for 2-Day Everest Base Camp High-Altitude Trek by HelicopterRequest a Callback - 2-Day Everest Base Camp High-Altitude Trek by Helicopter
Submit the form and we will be back to you shortly
Request a Callback - 2-Day Everest Base Camp High-Altitude Trek by Helicopter
Submit the form and we will be back to you shortly
Narayanhiti Palace Museum

Narayanhiti Palace Museum


