


How to Book an Everest Base Camp Trek Online (Step-by-Step Guide)
Learn how to book an Everest Base Camp trek online with this step-by-step guide. Discover the best seasons, permits, agencies, costs, and essential tips before trekking to Everest Base Camp.
")
-
 Adventure Master Trek
-
10 March, 2026
-
14 mins read
-
666 Views
-
0 Comments
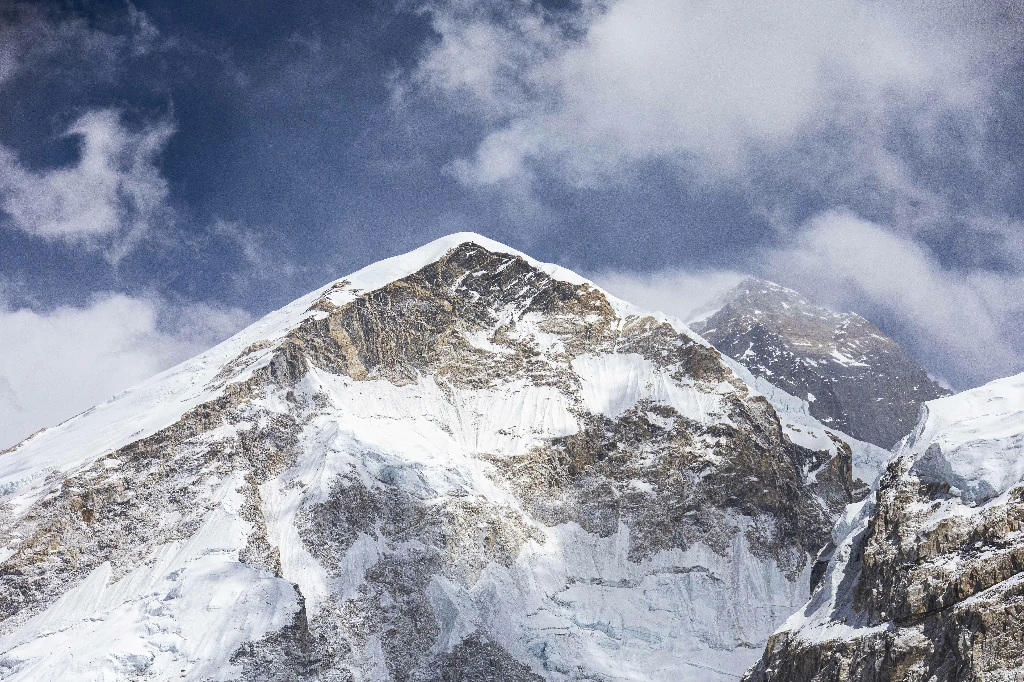
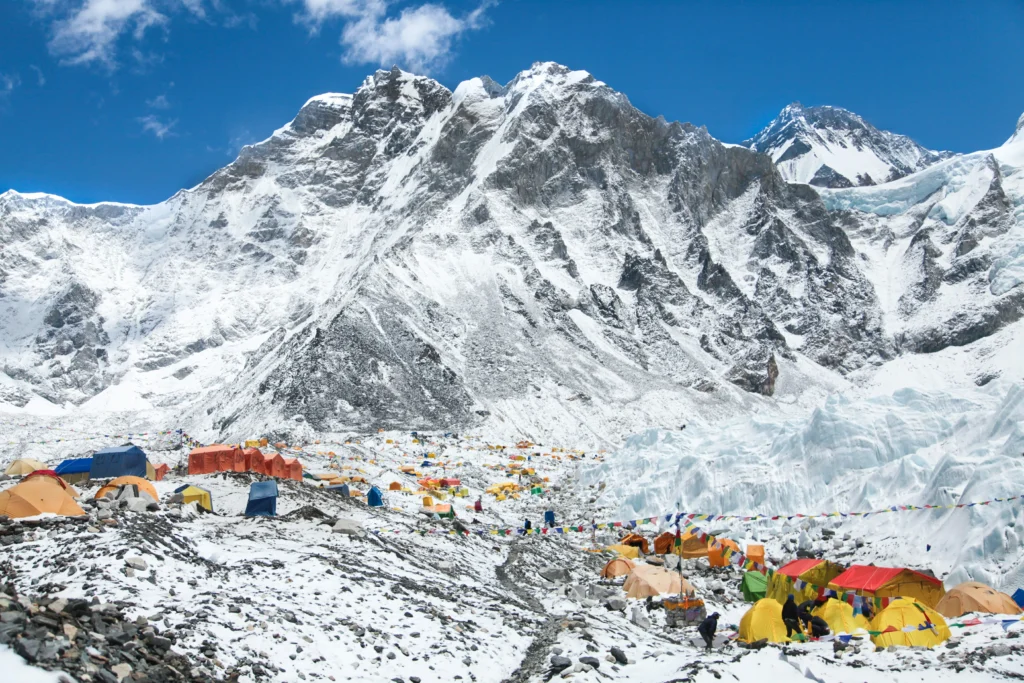
Standing at 5,364 meters above sea level, Everest Base Camp is the kind of destination that quietly occupies the back of your mind for years before you finally decide to do something about it. Maybe you’ve told yourself it’s too difficult, or too expensive, or too tangled in logistics to organize from the other side of the world. The truth is, none of those things are really true — at least not if you approach the booking process with a clear head and a decent plan.
Trekking agencies have built solid online presences, the permit system is well-understood, and the trail itself follows a single route through the Khumbu Valley. What tends to trip people up isn’t the trail — it’s the paperwork, the permit sequence, the question of whether to go guided or independent, and figuring out which agency to actually trust. This guide walks you through every step in plain terms, from the moment you decide you want to go, to the moment you step off the plane in Kathmandu ready to start walking.
Step 1: Pick Your Season Before You Do Anything Else
This is the one decision that cascades through everything else. The season you choose determines your weather, your teahouse availability, the cost and ease of booking Lukla flights, and how crowded the trail will be. It’s worth getting right before you start comparing packages.
The two windows that work are spring, which runs roughly from March through May, and autumn, which covers September through November. Spring has warmer days, rhododendrons in bloom lower on the trail, and an energy on the route that comes from Everest climbing expeditions passing through Base Camp on their way up. Autumn tends to be sharper and clearer after the monsoon clears the air, with exceptional visibility and a string of Nepali festivals filling the villages along the way.
Of the two seasons, October has the strongest reputation — stable weather, clear skies, and the trail at its most operational. The downside is that it’s also the most popular month by a distance, which means teahouse beds book out early and Lukla flights can be competitive. If you want nearly identical conditions with a noticeably quieter trail, late March or the first two weeks of November are worth considering seriously.
Winter, from December through February, is cold but genuinely beautiful. The trails thin out, the lodges are quieter, and on clear days the views are staggering. But temperatures at higher elevations can drop below minus twenty Celsius, and you’ll need gear and experience to match. Monsoon season — June through August — is best set aside entirely. The trails turn muddy, the mountain views disappear behind cloud cover for days at a stretch, and Lukla flight disruptions become routine.
The simplest advice: aim for spring or autumn, build your plans around late March to mid-April or October into early November, and you’ll be trekking in conditions that reflect why the Everest region has the reputation it does.
Step 2: Decide Whether You Want a Guide or Not
Before you start browsing agency websites, you need to settle on your approach, because it determines what you’re actually looking for when you search.
There are three ways people do this trek. The first is a fully guided package, where a trekking agency handles the entire operation — permits, domestic flights, accommodation, a licensed guide, and porters if you want them. You land in Kathmandu and slot into a planned itinerary. This is how the majority of first-time EBC trekkers do it, and for good reason.
The second approach is organizing most of the logistics yourself — flights, accommodation, and permits — while still hiring a guide privately, either through an agency or through connections in Kathmandu. This gives you more flexibility over your pace and rest days, but it requires more preparation before you arrive and a higher tolerance for managing details in real time.
The third approach is going fully independent. You handle everything yourself. It’s cheaper, but it demands several extra days in Kathmandu sorting permits and logistics, and you’re on your own if anything goes wrong on the trail at altitude.
For most people, especially those trekking the Khumbu for the first time, a guided package from a reputable agency is worth what it costs. A good agency will plan your acclimatization schedule properly, manage your permits, and have protocols in place if someone in your group develops altitude sickness. The fee difference between a budget agency and a solid one is small compared to the cost of a helicopter evacuation or a ruined trip.
One thing that bears saying plainly: the cheapest option is rarely the best one on a high-altitude trek. Corner-cutting in guide training, rushed acclimatization schedules, and poor emergency planning are all more common at the budget end of the market. Above 3,500 meters, those shortcuts become genuinely dangerous.
Step 3: Research Agencies Properly Before You Commit
Once you know your season and your approach, it’s time to find an agency you trust. This is where people either do the work and have a good experience, or rush through it and regret it somewhere around Lobuche.
Start by checking that any agency you’re considering is registered with the Nepal Tourism Board and the Trekking Agencies’ Association of Nepal, commonly referred to as TAAN. These are baseline credentials that any legitimate operator should be able to confirm. If their website doesn’t mention them, ask directly by email before going any further.
From there, go looking for independent reviews rather than testimonials on the agency’s own website. TripAdvisor and Google Reviews are useful starting points, but also check trekking forums and community boards where people write longer, more candid accounts of their experiences. Pay attention to reviews from the last twelve to eighteen months. Look specifically for what people say about guide quality, how the agency communicated when problems arose, and whether the actual experience matched what was sold.
Look carefully at what each package actually includes. A well-structured itinerary should be specific: permits, airport transfers in Kathmandu, both-way Lukla flights, guide and porter fees, accommodation standard, and meal inclusions. Anything described vaguely is worth pressing on before you pay.
Pay attention to how quickly and helpfully the agency responds to your initial inquiry. Send them a specific question or two — not just “what does the trek cost?” but something that requires a real answer, like asking how they handle weather delays or what their altitude sickness protocol involves. Agencies that respond promptly with useful detail tend to be the ones that support you well on the trail. Agencies that reply with generic brochure language are telling you something too.
One non-negotiable when reviewing itineraries: the schedule must include proper acclimatization rest days. That means a rest day at Namche Bazaar, which sits at around 3,440 meters, and another at Dingboche or Pheriche in the 4,200 to 4,400 meter range. Any itinerary that compresses or skips these stops to shorten the trip isn’t a bargain — it’s a serious health risk dressed up as good value.
Step 4: Choose Your Package and Get the Details in Writing
Most agencies offer EBC packages in three durations: 12 days, 14 days, or 16 days from Kathmandu. The 12-day version leaves almost no slack for acclimatization and puts you in a difficult position if flights are delayed or you need an extra rest day. Fourteen days is the most commonly booked option and the one that makes practical sense for most trekkers. Sixteen days builds in a buffer for weather disruptions, which is genuinely useful if you have a fixed departure flight home and cannot afford to be caught out.
Standard guided tea-house packages for 2026 and 2027 typically sit in the range of $1,000 to $2,000 per person, covering the essentials. Luxury versions with upgraded lodges and helicopter components can run significantly higher. When comparing packages that appear similarly priced, verify that they’re actually equivalent — one agency’s all-inclusive fee might exclude porter costs, while another’s higher quote might cover things you wouldn’t have thought to ask about.
Before confirming anything, get answers to the questions that matter: whether the Lukla return flight is included; how large the group will be; what the guide-to-trekker ratio is; what the agency does if a trekker develops altitude sickness and needs to descend urgently; and whether the booking can be rescheduled if a weather cancellation disrupts the Lukla flight and throws the whole itinerary off.
Most agencies will accommodate reasonable customization — adding a porter, building in an extra acclimatization day, or extending the route to take in the Gokyo Lakes. Whatever you agree on, confirm it in writing before any money changes hands.
Step 5: Know the Permits You Will Need
Every foreign trekker entering the Khumbu region needs two separate permits. If you’re going through an agency, they’ll handle the collection process — but understanding what these permits are and what they cost means nothing comes as a surprise.
The first is the Sagarmatha National Park Entry Permit. Sagarmatha National Park is a UNESCO World Heritage Site covering the entire Everest region, and this permit is the basic entry requirement for all foreign visitors. The fee for non-SAARC nationals is NPR 3,000 per person, which works out to roughly USD 22 to 25. It can be obtained at the Nepal Tourism Board office in Kathmandu, near Bhrikutimandap close to the Thamel district, or at the park entrance checkpoint in Monjo on the trail itself.
The second is the Khumbu Pasang Lhamu Rural Municipality Entry Permit. This local government permit replaced the old TIMS card for the Everest region when Nepal restructured its administrative system in 2018. It currently costs NPR 2,000 to 3,000 per person for foreign nationals. Unlike the Sagarmatha permit, this one is issued in Lukla after you land, or at checkpoints further along the trail — there is no Kathmandu office that processes it.
Trekking without valid permits carries real consequences. Fines can reach NPR 20,000, and checkpoint staff are entitled to deny entry and turn trekkers back on the trail. Once a permit has been activated by use, it is not refundable.
To collect permits — whether your agency is handling it or you’re doing it yourself — you will need your passport with at least six months’ validity remaining from your Nepal entry date, your Nepal tourist visa, two to four passport-sized photos, and a copy of your travel insurance policy. Bring more photos than you think you’ll need; they’re asked for at several points through the process.
Step 6: Handle Your Nepal Visa
Nepal issues tourist visas on arrival at Tribhuvan International Airport in Kathmandu. You can also apply through the Nepal Department of Immigration website before you travel, which reduces queuing time on arrival. The standard options are 15-day, 30-day, and 90-day visas. For a typical EBC trek, a 30-day visa covers most itineraries comfortably, including a few days in Kathmandu at the start and end.
For most nationalities, the cost is USD 30 for 15 days and USD 50 for 30 days. SAARC country nationals pay reduced rates. Bring USD cash if you plan to pay on arrival, as card processing at the airport visa counter can be unreliable.
Step 7: Book Your Flights and Sort Your Insurance
International flights into Kathmandu are your first and last logistical anchor. Once your trek dates are confirmed with the agency, build a buffer into your flight bookings on both ends. Arrive in Kathmandu a day before the trek begins in case of travel disruptions, and leave at least one full day between returning from the mountains and your outbound international departure. Lukla flight cancellations caused by mountain weather are common enough that attempting to catch a connecting international flight on the same day as your Lukla return is a plan that regularly falls apart.
On insurance: there is no sensible argument for skipping it on a high-altitude trek. An emergency helicopter evacuation above 5,000 meters can cost between USD 5,000 and USD 10,000 or more without coverage. Make sure your policy explicitly covers high-altitude trekking above 5,000 meters, emergency helicopter evacuation, medical treatment and hospitalization, and trip cancellation. Some policies — including ones marketed specifically to adventure travelers — cap altitude coverage at 4,500 meters, which would leave you uninsured above Dingboche. Read the actual policy wording, not just the product summary page.
Step 8: Pay Your Deposit and Lock In the Booking
When you are ready to commit, most reputable agencies ask for a deposit of around 10 to 20 percent of the total cost to confirm your place. The remainder is typically settled in cash or by card on arrival in Kathmandu, depending on the agency.
Once your deposit is paid, you should receive a written itinerary with a day-by-day breakdown, a clear confirmation of what is and isn’t included, emergency contact details for the agency, and a request for your passport and insurance information. Keep copies of everything — stored both digitally and in print. Send your agency your flight arrival details so they can arrange your airport transfer before you land.
Step 9: Give Your Body Time to Be Ready
Everything covered so far is paperwork and planning. The actual challenge of Everest Base Camp is physical, and the weeks before your departure are as important as anything you sort online.
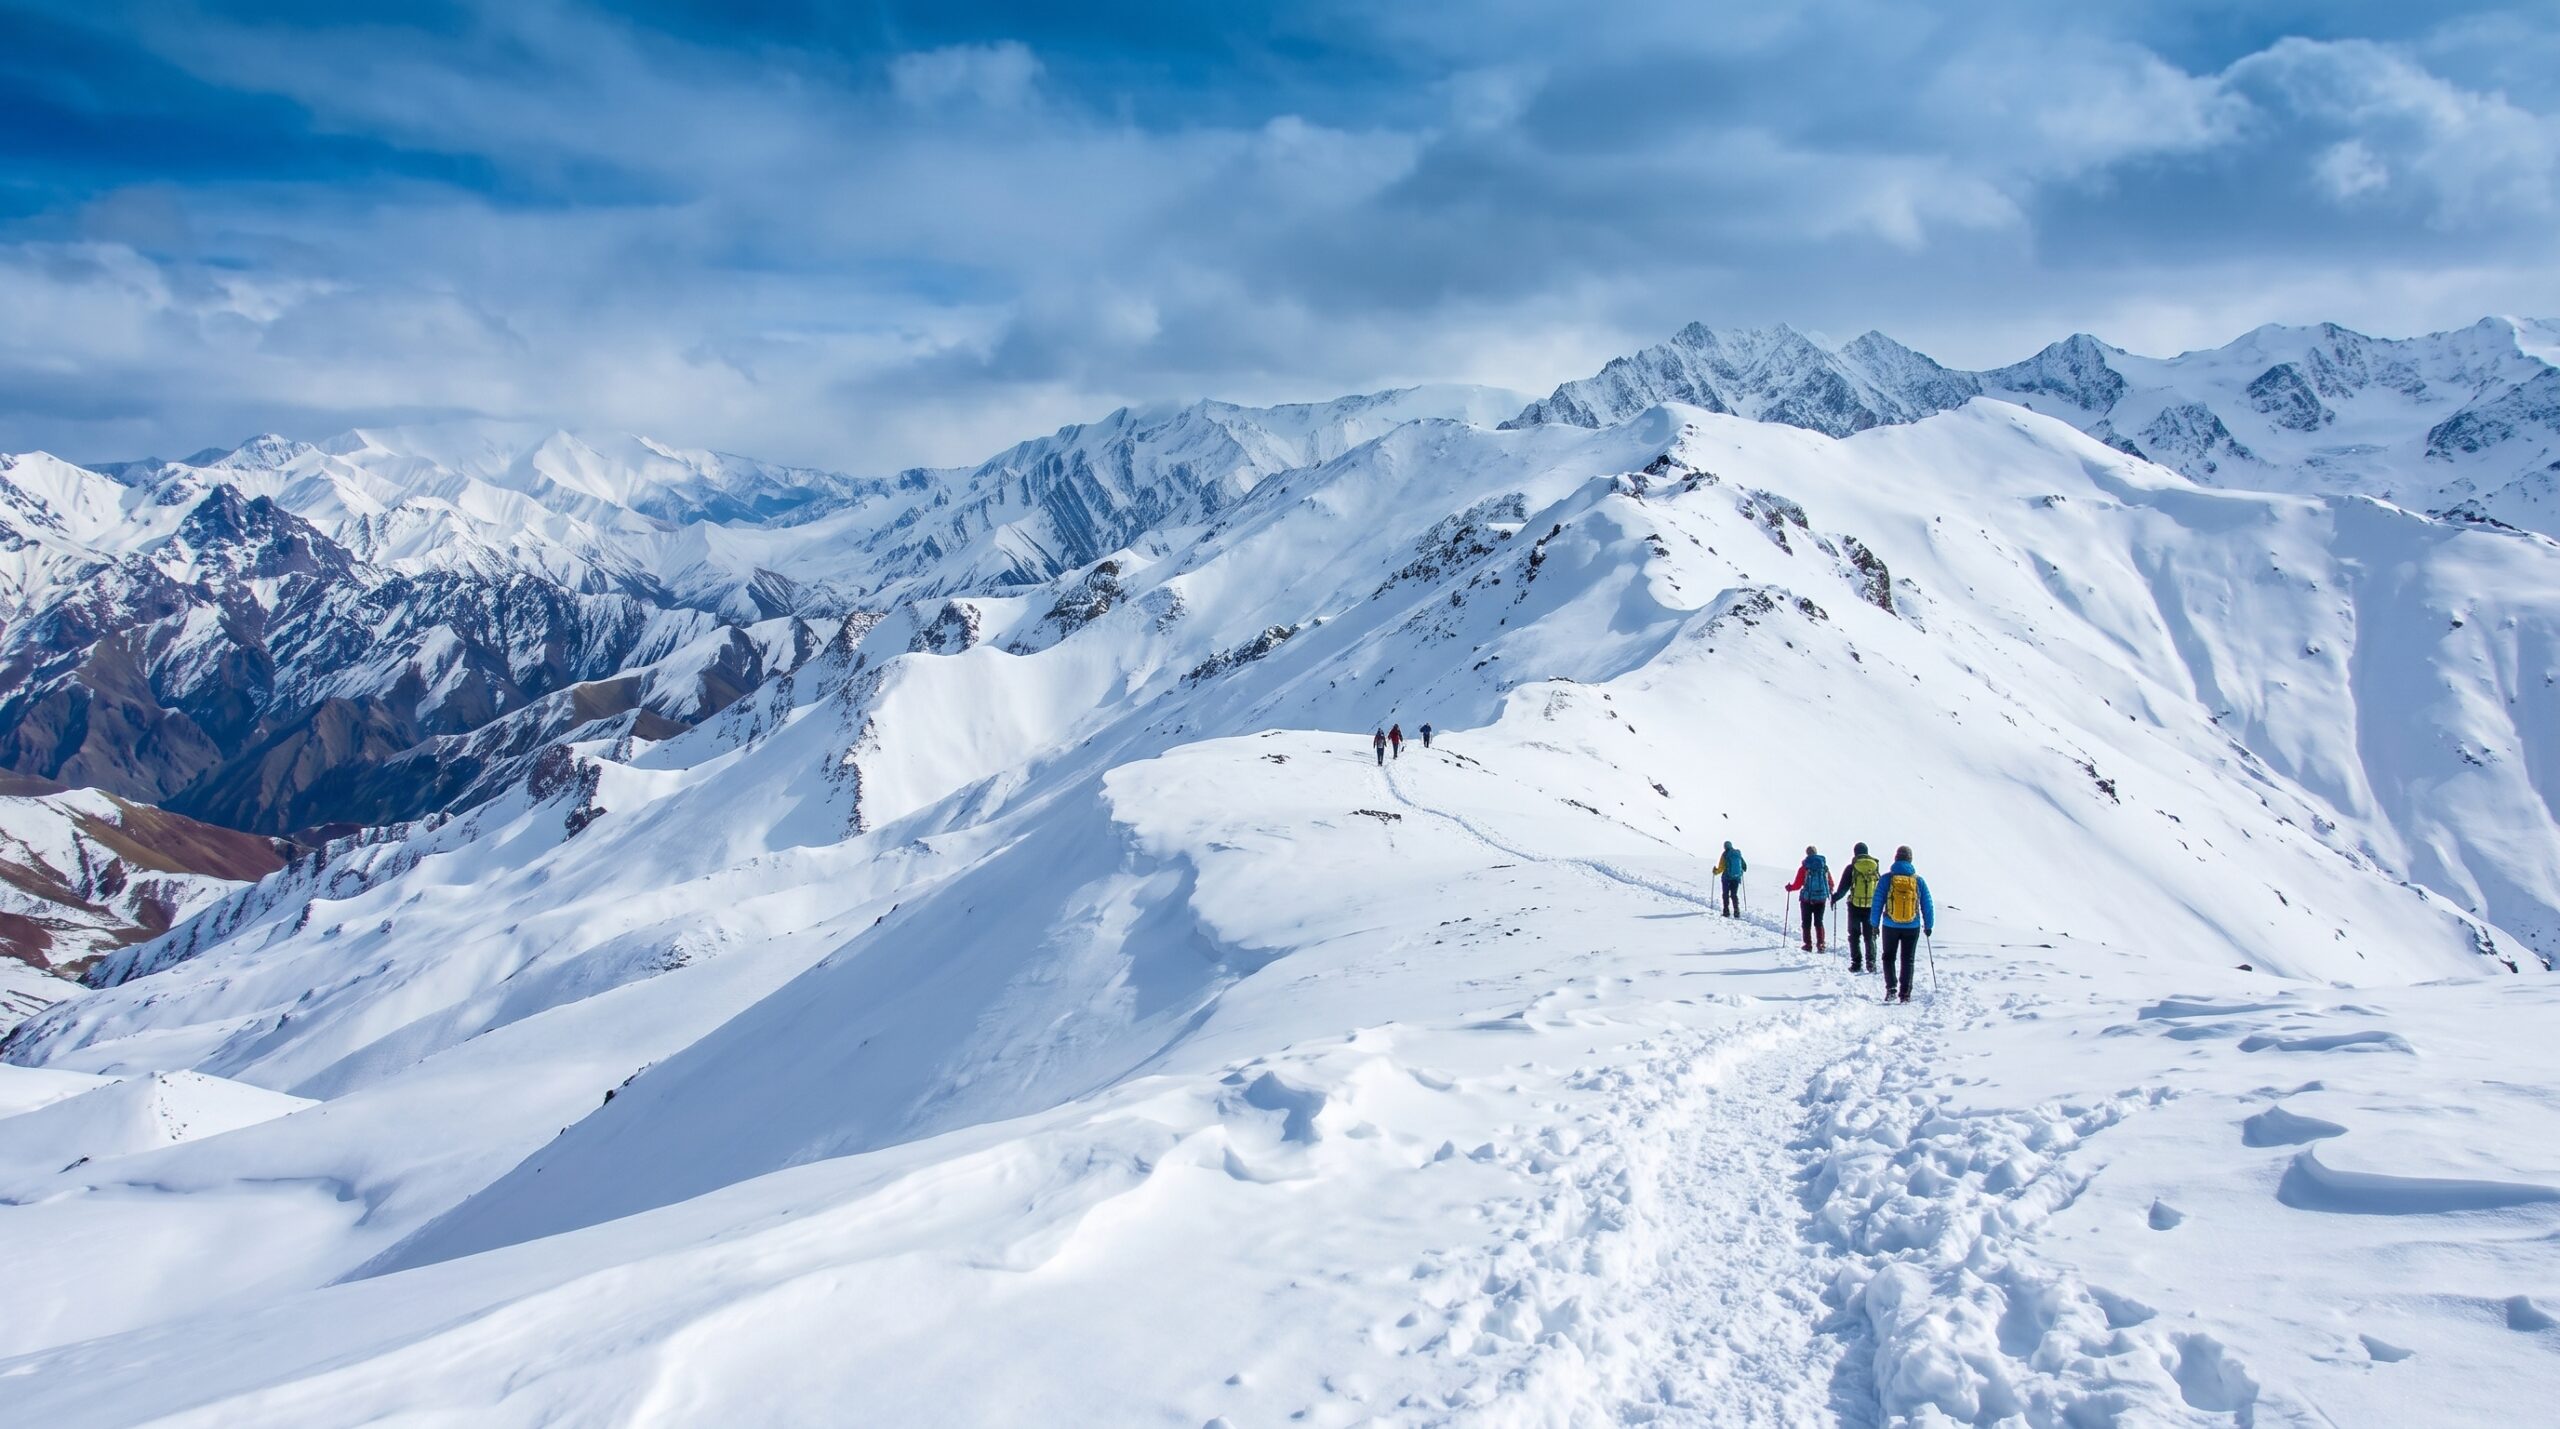
The trek involves 12 to 14 days of continuous walking at altitude, with most days covering five to seven hours of movement. The highest point most trekkers reach isn’t Base Camp itself but Kala Patthar, a rocky summit at 5,545 meters just above Gorak Shep, where the views of Everest are clearest. Base Camp is set into the moraine and doesn’t offer the dramatic panorama most people picture when they imagine it.
Start a regular training routine at least eight weeks before you leave, twelve if you can manage it. Cardio endurance is what the trail demands most — running, cycling, and loaded walking will all prepare you well. Knee strength matters too, particularly on the long descents on tired legs. Squats, lunges, and stair work will repay you on the way down from Namche.
Learn to recognize altitude sickness before you’re standing on a high pass trying to decide whether what you feel is normal or not. Symptoms include a persistent headache that doesn’t respond to water and rest, nausea, dizziness, and breathlessness at rest. The rule on the trail is straightforward: if symptoms develop and don’t improve after a day of rest, descend. Talk to your doctor before the trip about whether acetazolamide, commonly known as Diamox, is appropriate for you as a preventive measure.
Before You Leave: What to Have in Order
In the days before your departure, run through these checks. Your trek booking should be confirmed with the deposit paid and the itinerary received in writing. Your Nepal visa should be sorted, either pre-applied online or set up for on-arrival collection. Travel insurance with helicopter evacuation coverage needs to be active before you fly. International flights should be booked with buffer days built in on both ends.
Bring at least six passport-sized photos. Keep digital and printed copies of your passport, visa, insurance policy, and booking confirmation. Your trekking gear — a quality down jacket, broken-in boots, and trekking poles — should be packed and tested before you arrive. And confirm with your agency that your Kathmandu airport pickup is arranged.
A Final Word
Booking an Everest Base Camp trek online is not as complicated as it first appears. The process has a logic to it: settle on your season, decide on your approach, find an agency with a real track record and transparent pricing, confirm every detail in writing, sort your permits and insurance, and then spend the weeks before departure preparing your body for what you’re asking it to do.
The paperwork takes a few hours. The preparation takes a few months. The trek itself takes two weeks. And the memory of it — the way the valley opens above Namche, the silence at dawn outside a Dingboche teahouse, the moment Base Camp resolves from the glacial moraine and you understand that you’re actually there — tends to stay with you considerably longer than that.
Do the groundwork properly, choose your agency with care, give yourself enough time to acclimatize, and go.
Comments (0)
Write a comment- Step 1: Pick Your Season Before You Do Anything Else
- Step 2: Decide Whether You Want a Guide or Not
- Step 3: Research Agencies Properly Before You Commit
- Step 4: Choose Your Package and Get the Details in Writing
- Step 5: Know the Permits You Will Need
- Step 6: Handle Your Nepal Visa
- Step 7: Book Your Flights and Sort Your Insurance
- Step 8: Pay Your Deposit and Lock In the Booking
- Step 9: Give Your Body Time to Be Ready
- Before You Leave: What to Have in Order
- A Final Word
Read the latest Blogs & Insights
Explore our collection of articles and insights to gain in-depth travel knowledge, expert advice, and stay updated on the latest trends and tips.


No comments yet.